

How To Backup An Iphone To A Windows Computer
* This mail is part of iPhone Life's Tip of the Day newsletter. Sign Up. *
At that place are ii ways to support your iPhone. Yous can back up your iPhone to iCloud or back up your iPhone to your computer. You tin can fifty-fifty back upwardly your iPhone to your Windows computer by using iTunes. Apple recommends having both an iCloud backup and a local fill-in, and nosotros agree! Backing up your iPhone is incredibly easy, and having both makes it more convenient and more secure. Here'due south how to dorsum upwardly your iPhone to your estimator.
Related: How to Encrypt Your iTunes iPhone Fill-in
How to Back Up iPhone & iPad to Your Computer
A local backup, kept on your figurer, is available when you don't have an internet connection, simply could be lost if you lose or damage your estimator. If yous are bankroll up temporarily considering yous are selling your iPhone, this is a great option! For comparison, an iCloud backup is kept in the deject where information technology is safe from difficult drive failures or lightning strikes, only where you need an net connection to access it. You can create iCloud backups automatically, while you lot sleep, by enabling iCloud Fill-in. By contrast, you don't need an net connection to dorsum up your iPhone to your computer. You just need your charging cable, your calculator, plenty storage space, and a piddling time.
Bound To:
How to Support iPhone to Mac
Hither's how to back upwardly iPhone to Mac:
- Connect your iPhone to your computer using the charging cable. You tin can connect via Wi-Fi if you have connected with a USB cable before and established it as a trustworthy connection.
- Unlock your iPhone using face ID or your device passcode.
- Open a Finder window.
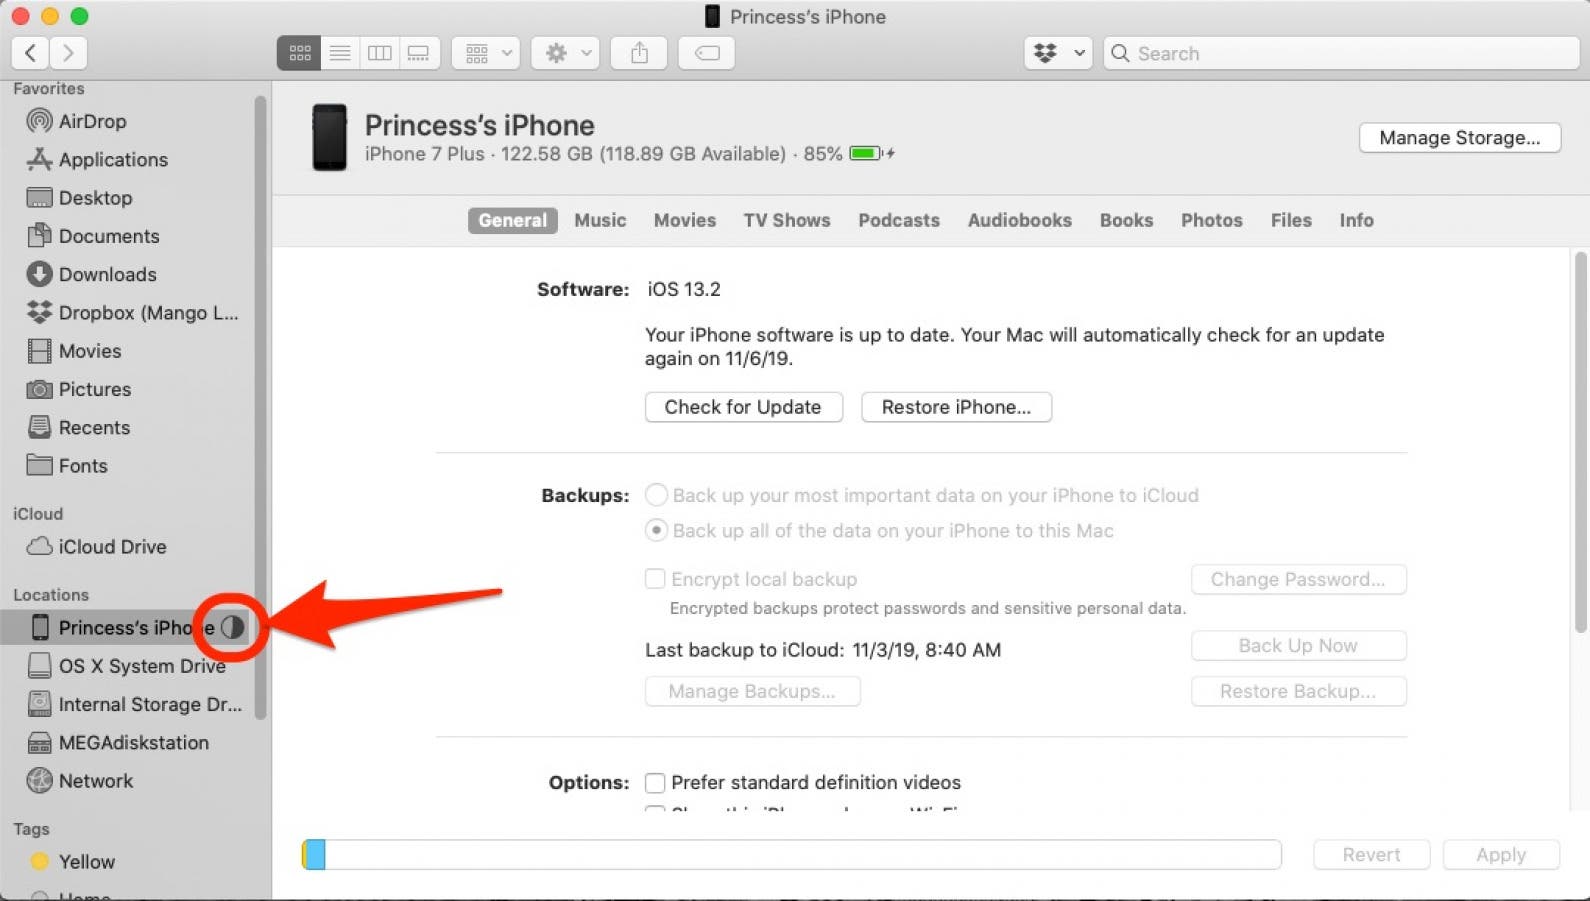
- Under Locations in your sidebar, click onyour iPhone.
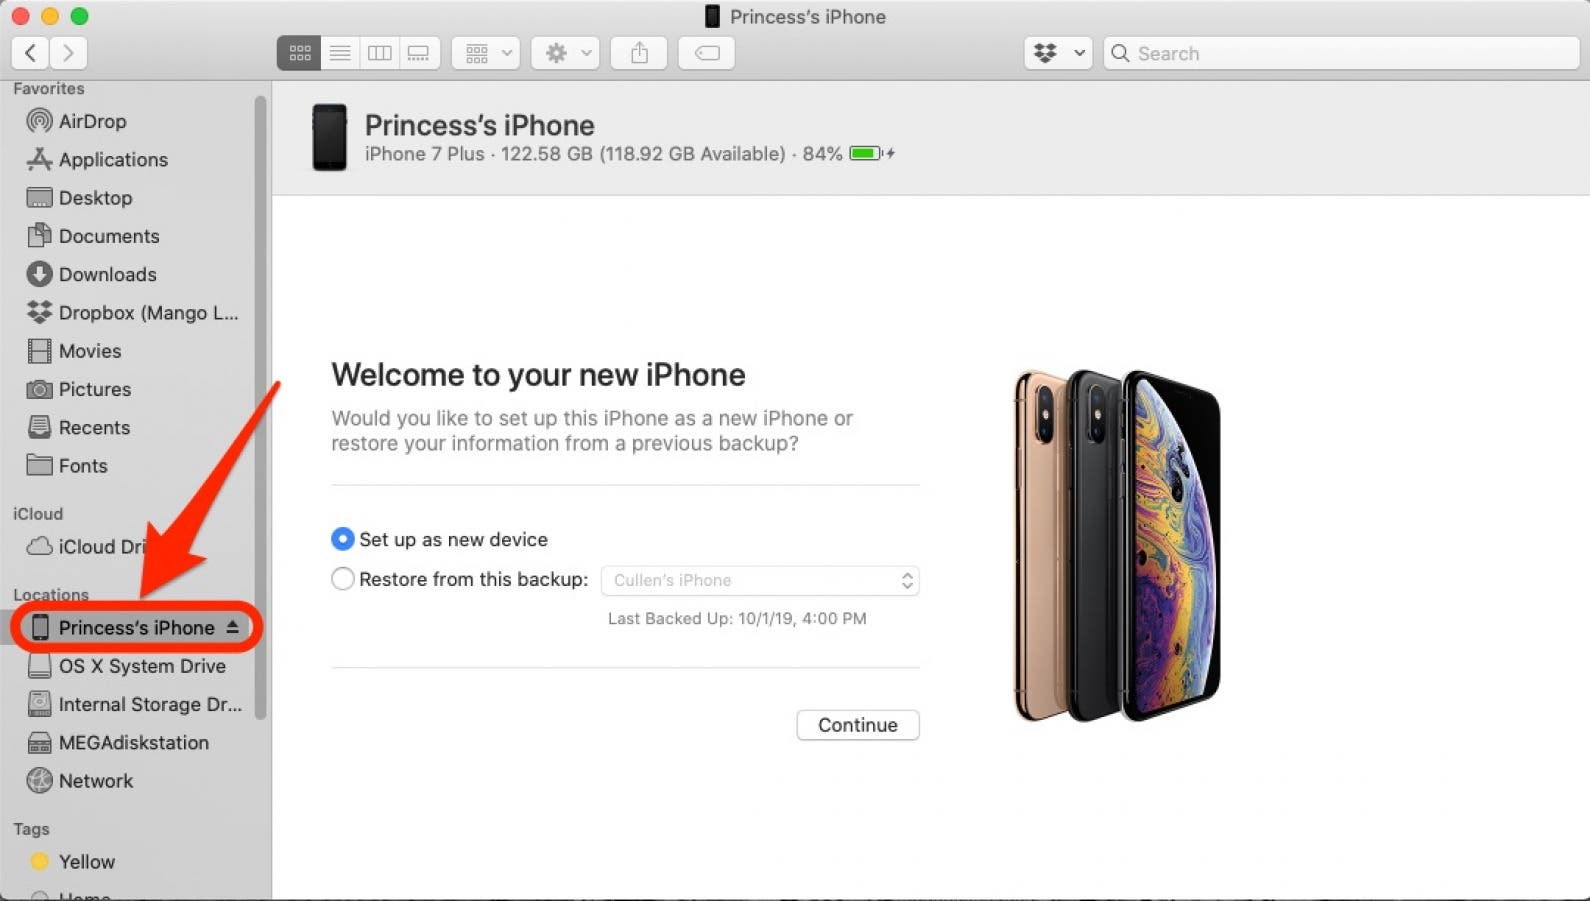
- If yous have previously backed upwards a different iPhone to your calculator, merely non the iPhone you are currently using, you may come across a special screen welcoming you to your new iPhone. SelectPrepare as new device and so clickContinue. If you don't see this screen, skip to pace vi.

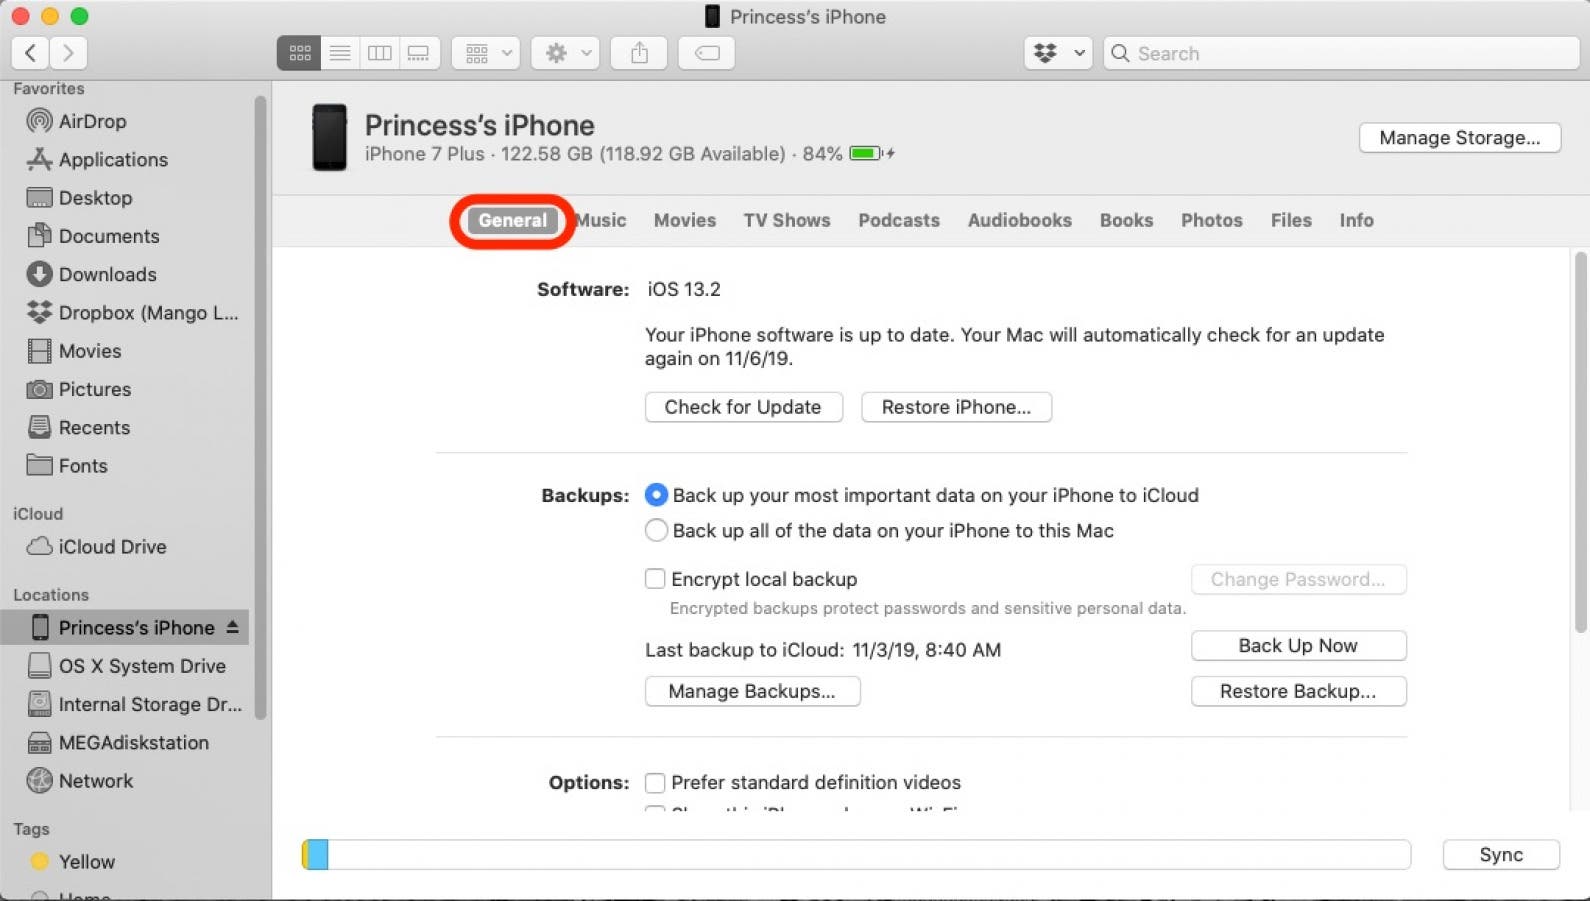
- You'll exist presented with an interface for browsing the contents of your iPhone and changing some of its settings. Make sure you are on the General tab.
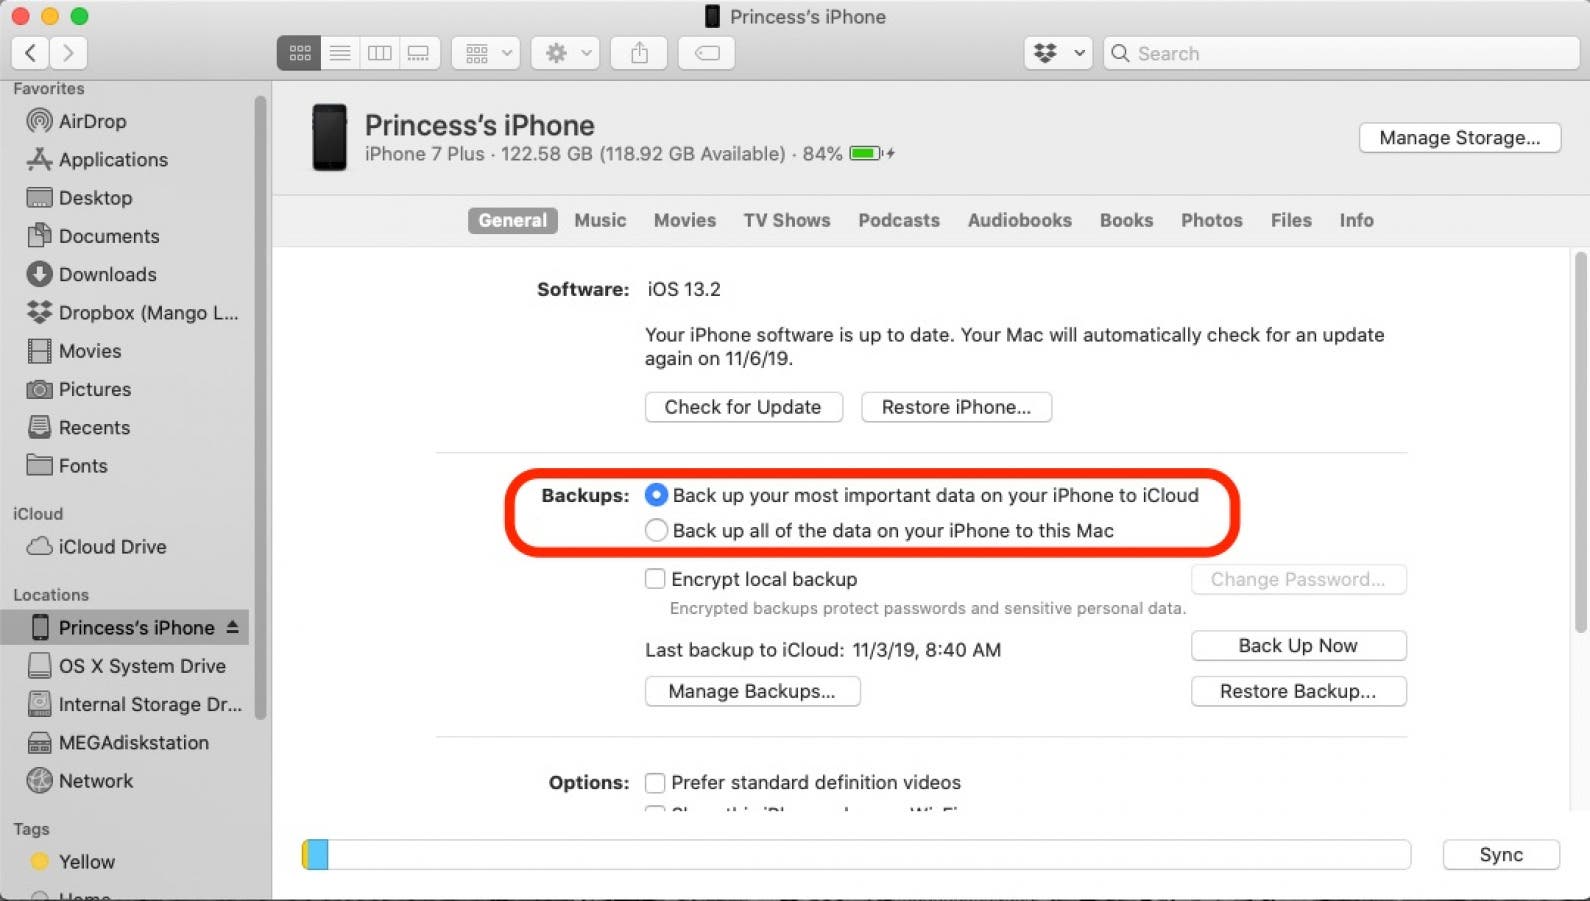
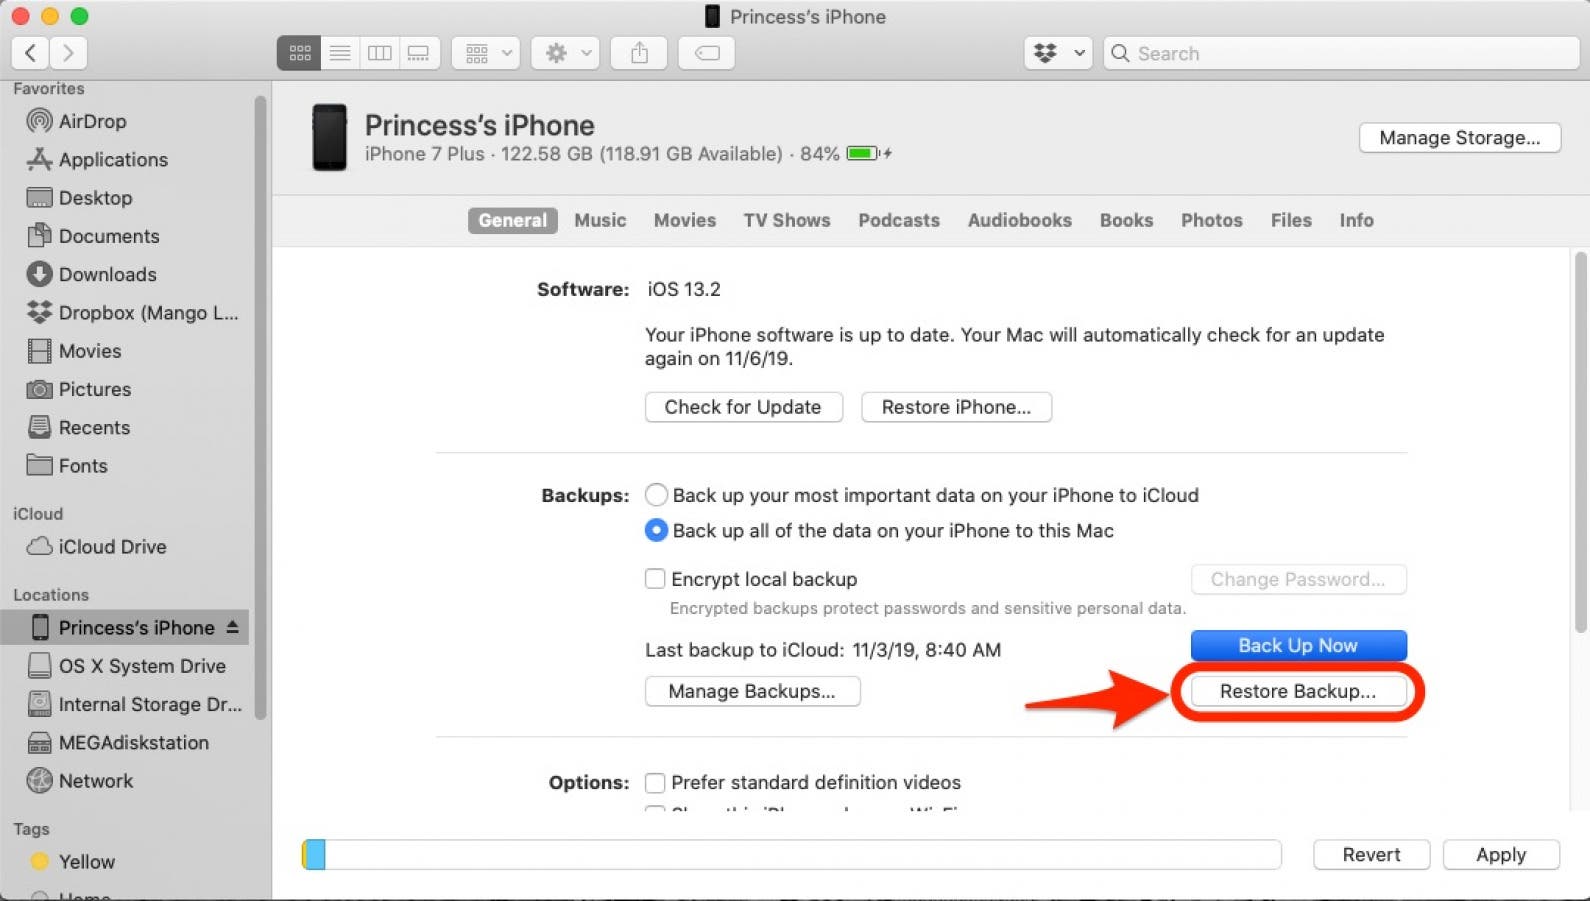
- In the section titled Backups you lot volition see 2 options: Back up your nearly important data on your iPhone to iCloud, and Back up all of the data on your iPhone to this Mac. This changes the automatic backup procedure:
- The iCloud pick automatically backs up your information at regular intervals to the iCloud, using your iPhone's internet connection. It'south pretty much hands-off, unremarkably working when you're asleep.
- The Mac option will automatically begin a backup of your iPhone whenever it is connected to the Mac computer.
- Selecting the Mac option disables the iCloud option, and vise versa. You can do it either mode; but if y'all aren't sure, I'd recommend keeping it set to the iCloud choice. You don't need to change this setting to practice a manual local back up, for that, go along following this guide.
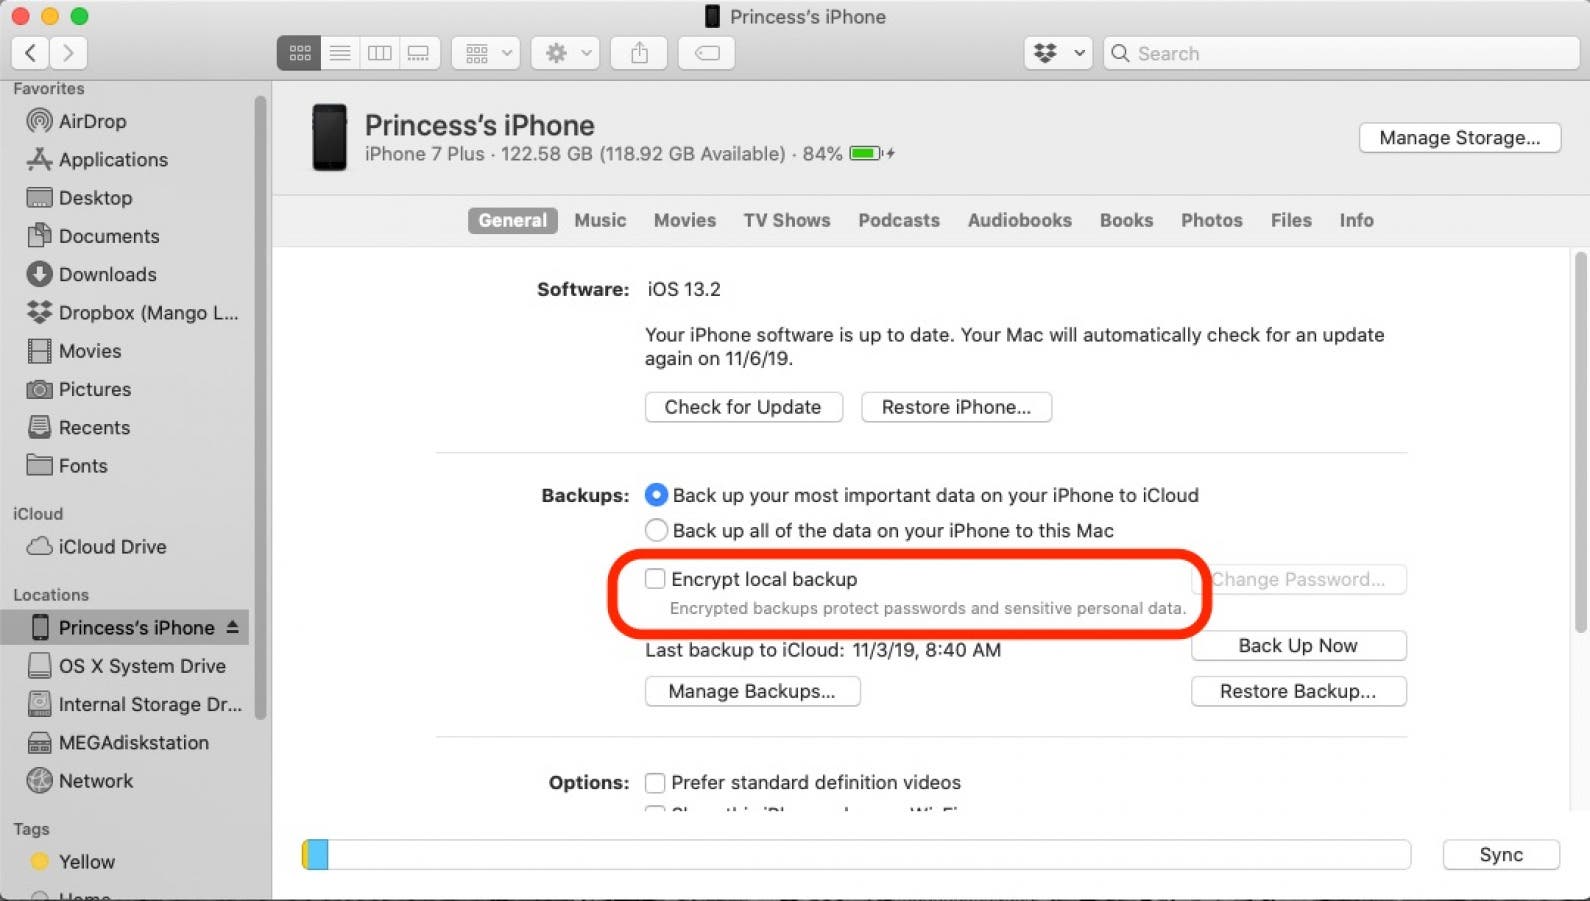
- Your iPhone fill-in will not include the Health and Activity data unless y'all checkEncrypt local backup. If you do, then a popup will immediately ask you to set a password for your fill-in. Be sure to set one you tin remember, considering there is no way to recover a lost password for one of your iPhone backups. If you don't need or want to include your Health and Activeness data, then you lot can skip this step, and create a local backup that is non encrypted.
- Click Back up Nowto initiate a manual local support of your iPhone to your Mac. This will not interfere with your automatic back upwardly settings, or alter them.

- Sentinel the status indicator side by side to your iPhone in the side bar. Don't unplug your iPhone until the process is complete!
- When you lot demand to restore your iPhone from a local backup, simply click the Restore Fill-in push on this screen.
- When the status indicator finishes, yous'll see that y'all can safely eject your iPhone. You're finished!
How to Dorsum Upwardly Your iPhone to Your Windows PC using iTunes
An iTunes backup is a handy thing to have. To support your iPhone or iPad to your Windows PC, you get-go demand to have the iTunes software installed. Windows users can download iTunes here.
To back up your device with iTunes:
- Connect your iPhone to your reckoner using the charging cord.
- You lot'll exist asked on both your estimator and on your Apple tree device whether y'all desire to trust the calculator to admission the device. Click or tap yep, then enter any device passcodes or passwords required.
- Open up iTunes.
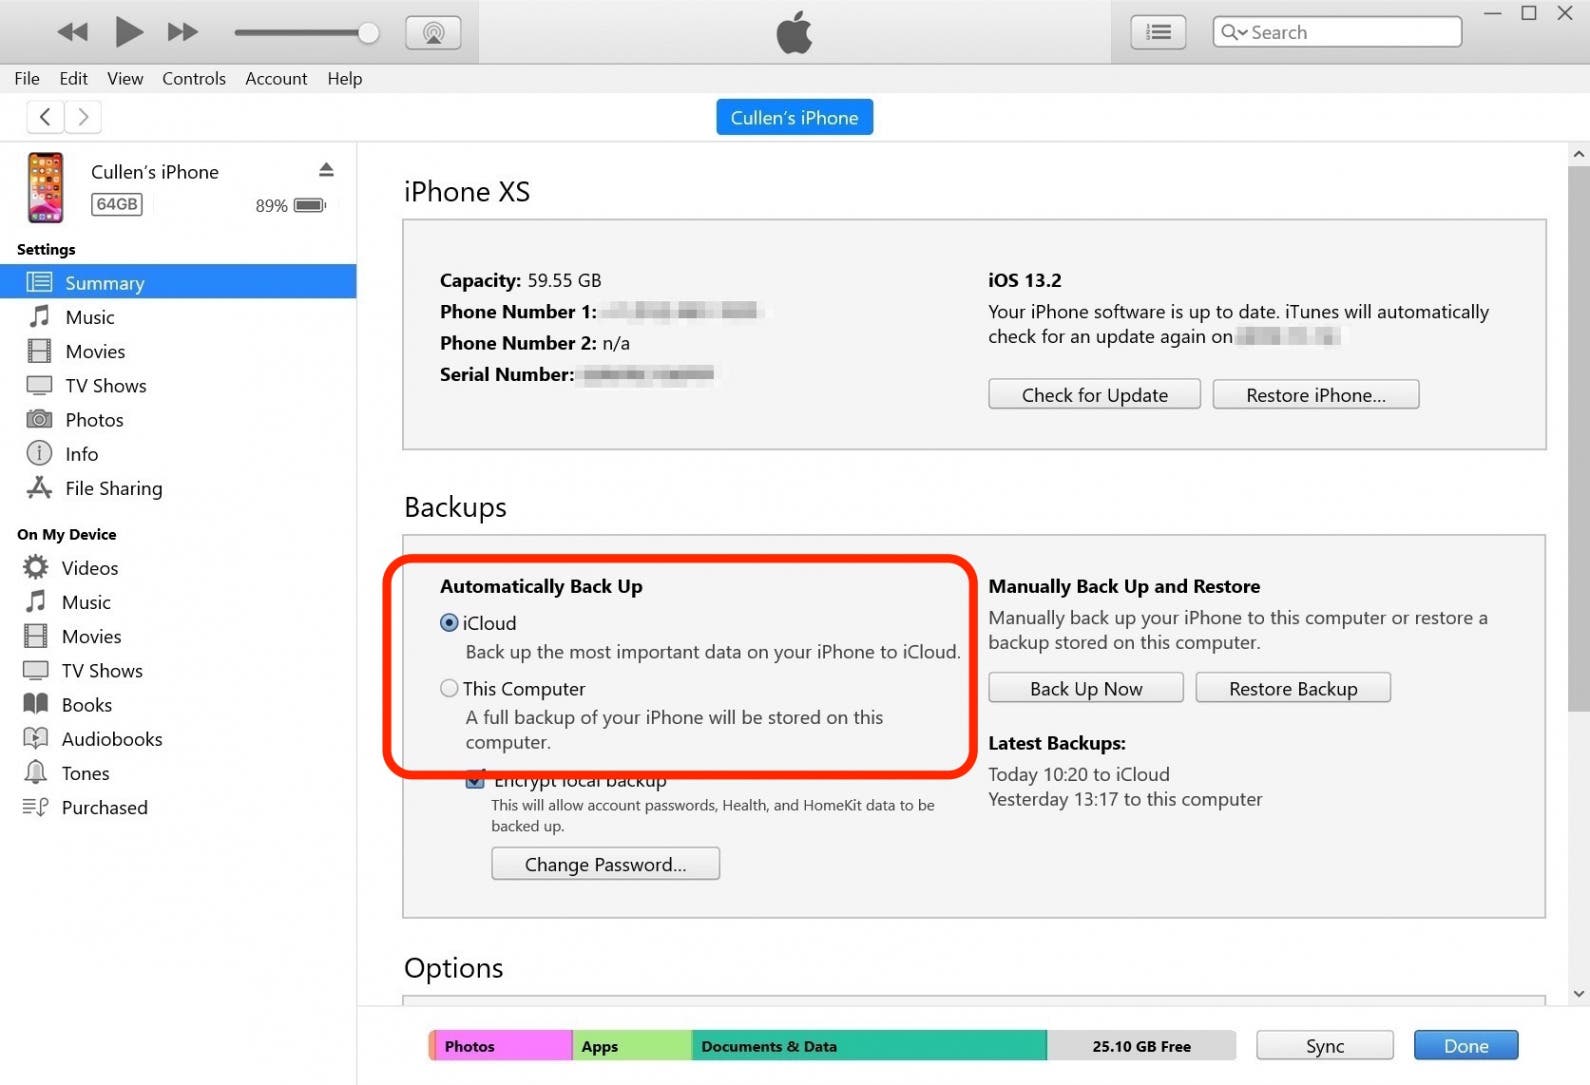
- In iTunes, locate the tiny icon for your iPhone or iPad, institute in the upper left section of iTunes. Click the icon.

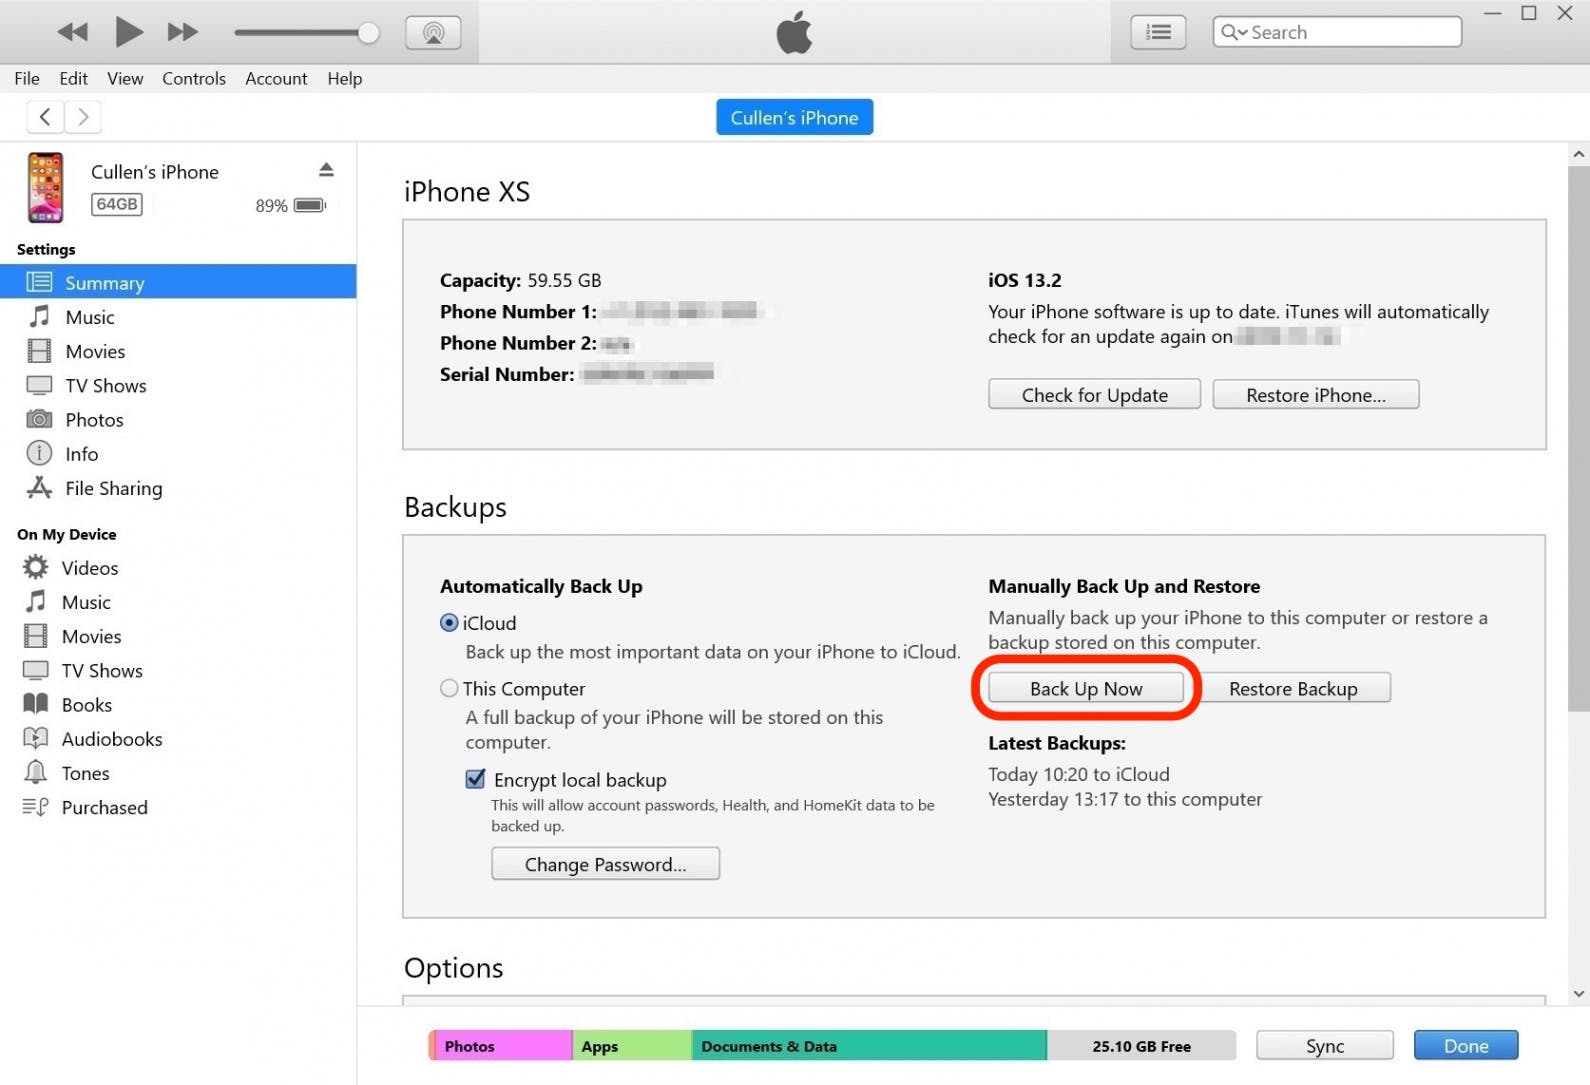
- Here you'll see options for backing upward your iPhone. In the section titled Automatically Back up you will see two options:iCloud, and This Calculator. This changes the automated backup proceedure:
- The iCloud option automatically backs up your information at regular intervals to the iCloud, using your iPhone'due south net connection. Information technology's pretty much hands-off, unremarkably working when you're asleep.
- The This Calculator option will automatically begin a backup of your iPhone only when it is plugged in to the Windows calculator with a cable.
- Selecting the This Computer option disables the iCloud option, and vise versa. You lot tin can practice it either style, but if you aren't certain, I'd recommend keeping information technology fix to the iCloud pick. Y'all don't need to modify this setting to do a manual local back up. For that, read on!
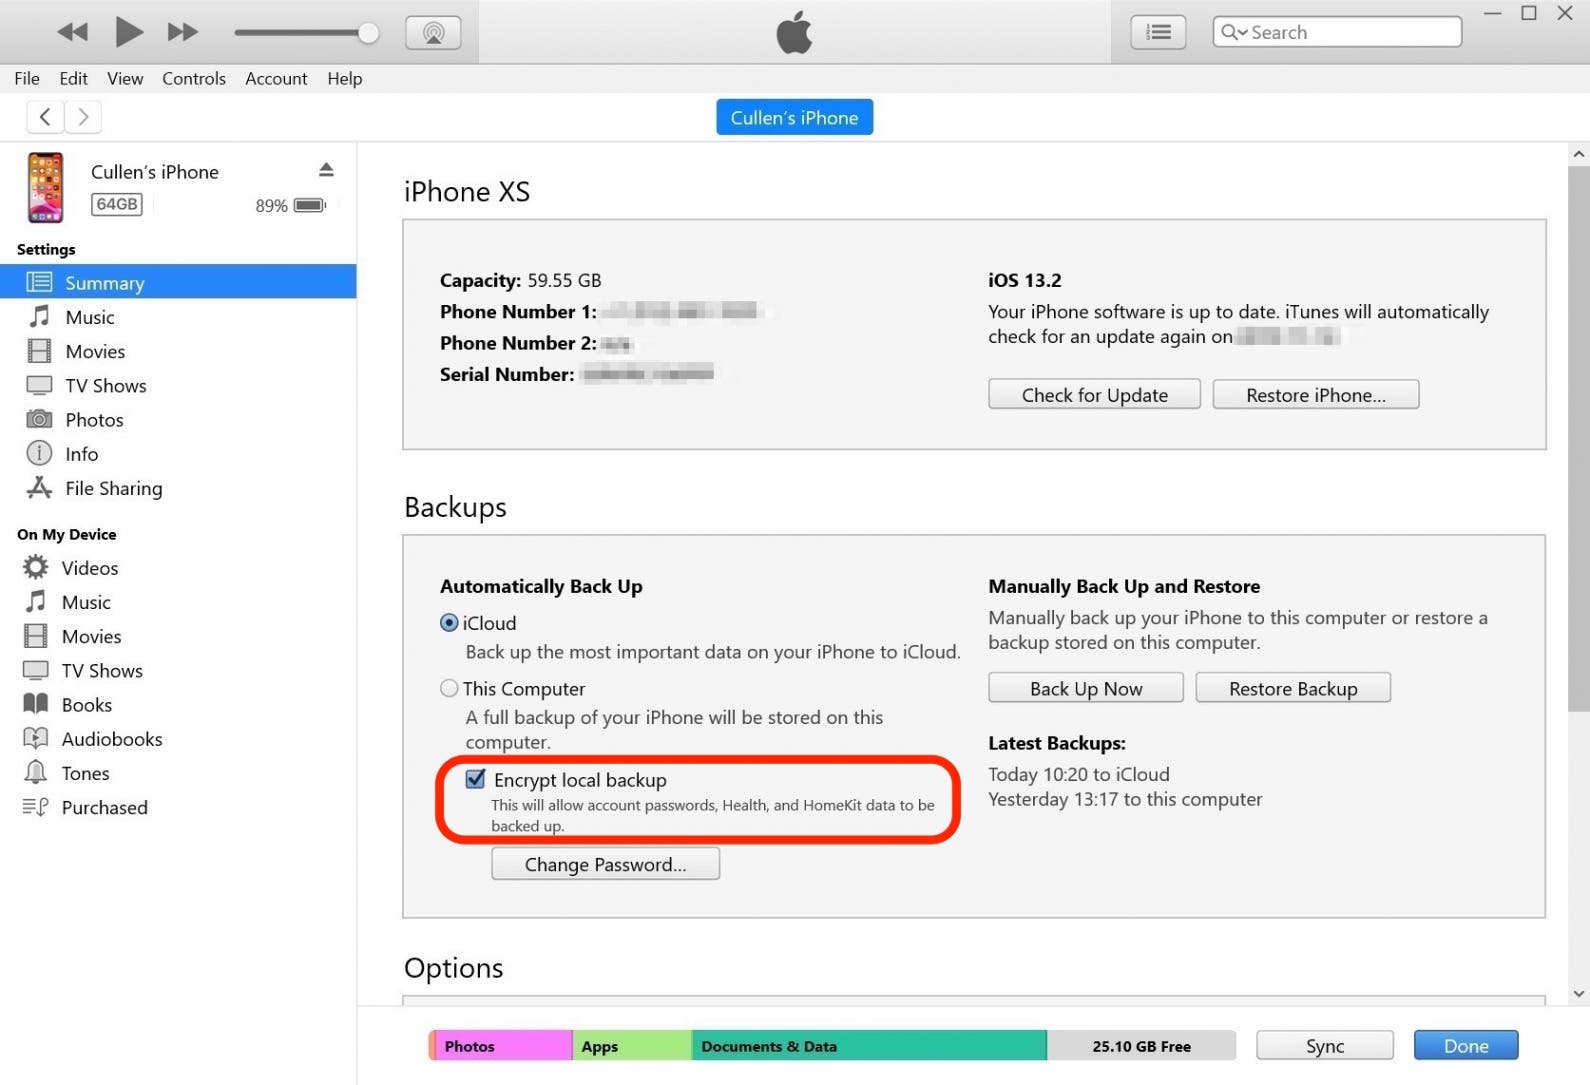
- If you desire your local fill-in to include your Wellness & Action data, as well as sensitive data like passwords and HomeKit settings, y'all'll need to check the Encrypt local fill-in option. If you do, then a popup will immediately ask yous to set up a password for the backup. Choose a password y'all can remember, or brand note of your password in a secure location, because there is no way to recover the password for an iPhone backup, should you lose it.
- Click Back up Now to initiate a manual local backup of your iPhone on your Windows PC. This will not interfere with your automated back up settings.
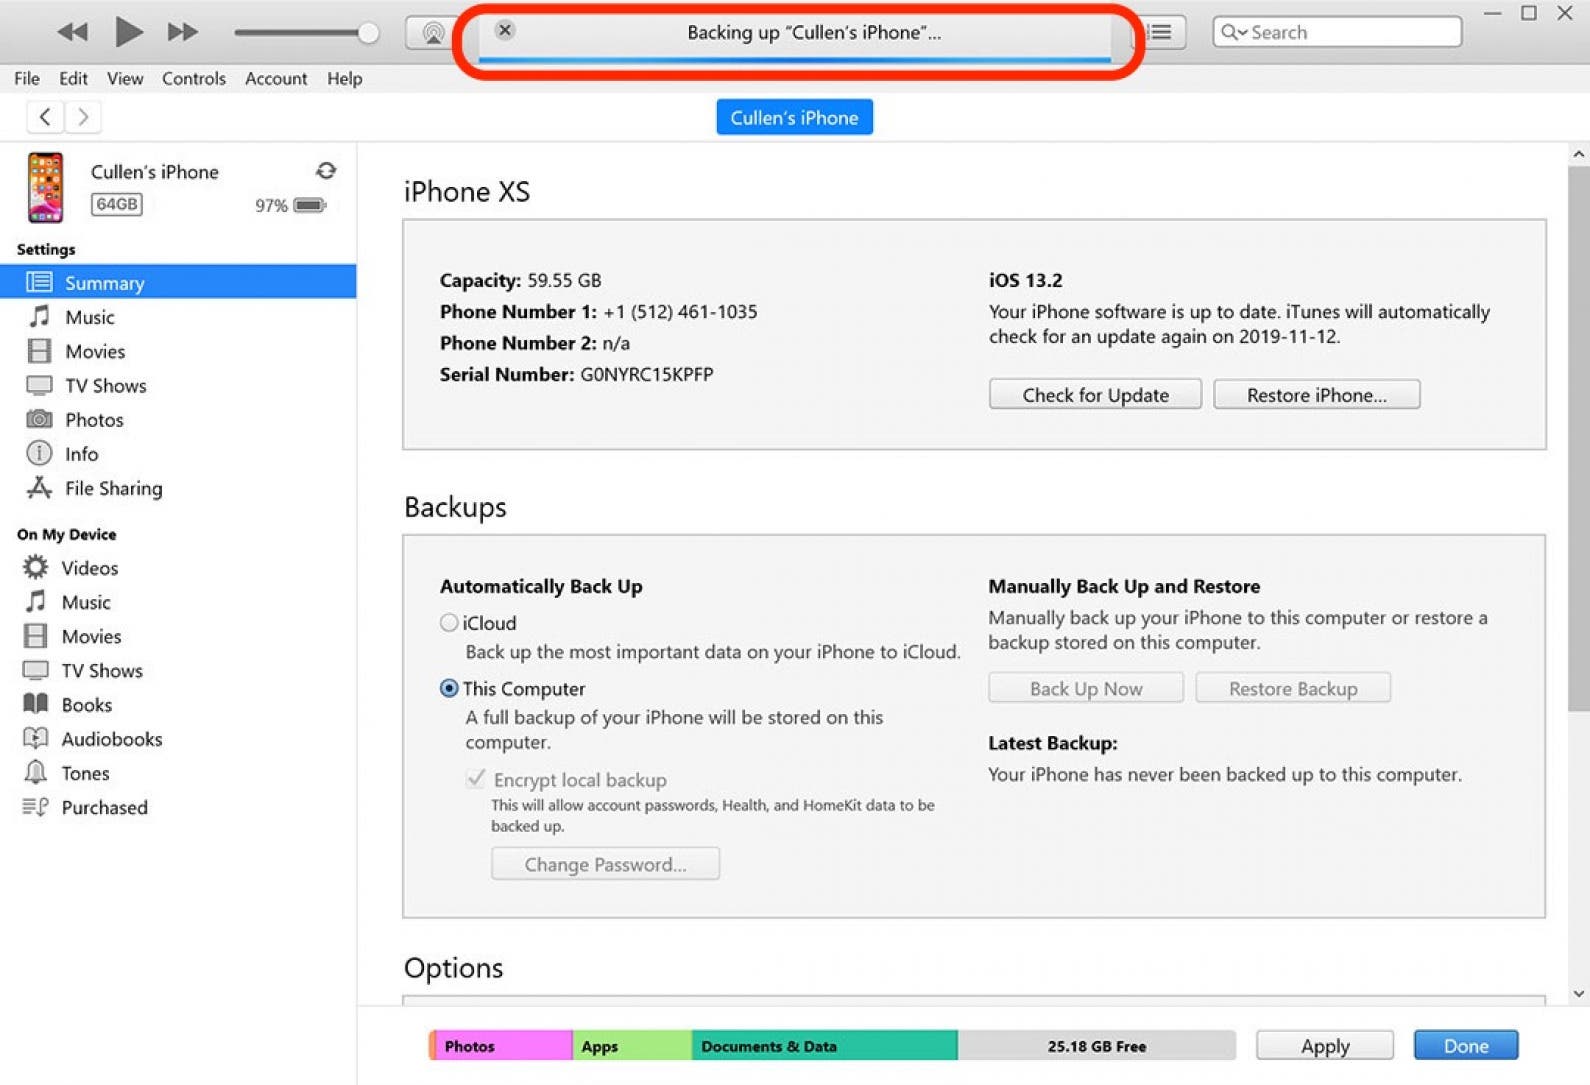
- Note the progress indicator at the acme of the iTunes window. Don't unplug your iPhone until the procedure is complete!
- When you're finished, you'll see the icon to safely eject your iPhone.
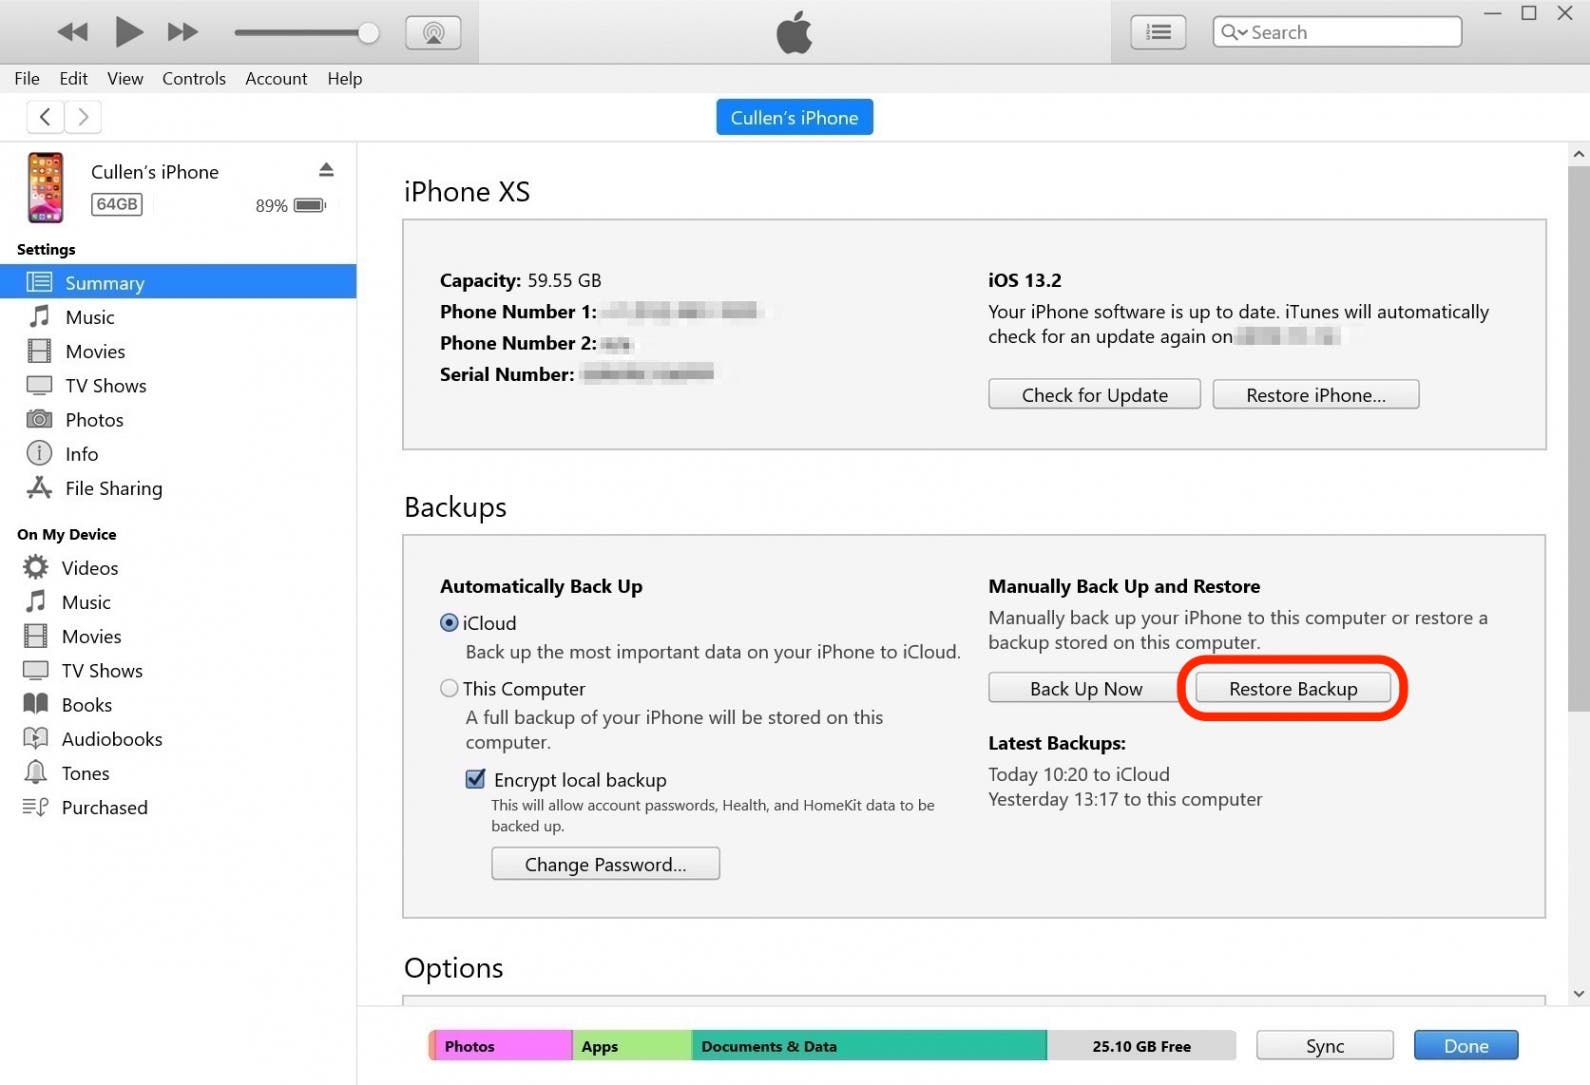
- In the future, if you demand to restore a backup, navigate dorsum to this screen and click on Restore Fill-in.
Don't forget that you should support your Mac as well! Learn how to support your Mac to iCloud here.
Top Image Credit: JKstock / Shutterstock.com
Source: https://www.iphonelife.com/content/tip-day-how-back-your-iphone-or-ipad-your-computer
Posted by: parkisonthempoess.blogspot.com
0 Response to "How To Backup An Iphone To A Windows Computer"
Post a Comment