

How To See Recently Opened Apps Windows 10
Is Windows 11's Quick Access Not Showing Recent Files? Here'south How to Fix Information technology
Quick Admission for Windows 11 is a handy way to go at your about contempo files, but sometimes information technology breaks. Here's how to come across your recent files again.

Quick Access in Windows 11 allows you to view the near frequently used folders and recent files at a glance. Unfortunately, for some users, Quick Access no longer shows the contempo files in File Explorer.
The recent files section in Quick Admission can go missing due to several reasons. Hither we bear witness you lot some quick troubleshooting steps to help you restore Recent Files under Quick Access in Windows 11.
1. Enable Leap List in the Settings Panel
Quick Admission may finish showing the recent files department if you have disabled the Testify recently opened items in Start, Bound List, and File Explorer choice in Settings. This is a alien state of affairs, as enabling this option volition too plow on the recommended section in the Commencement menu and get in look organized.
To enable Jump List for File Explorer:
- Press Win + R to open up Run.
- Type ms-settings: and click OK to open the Settings app. Do not forget the colon.
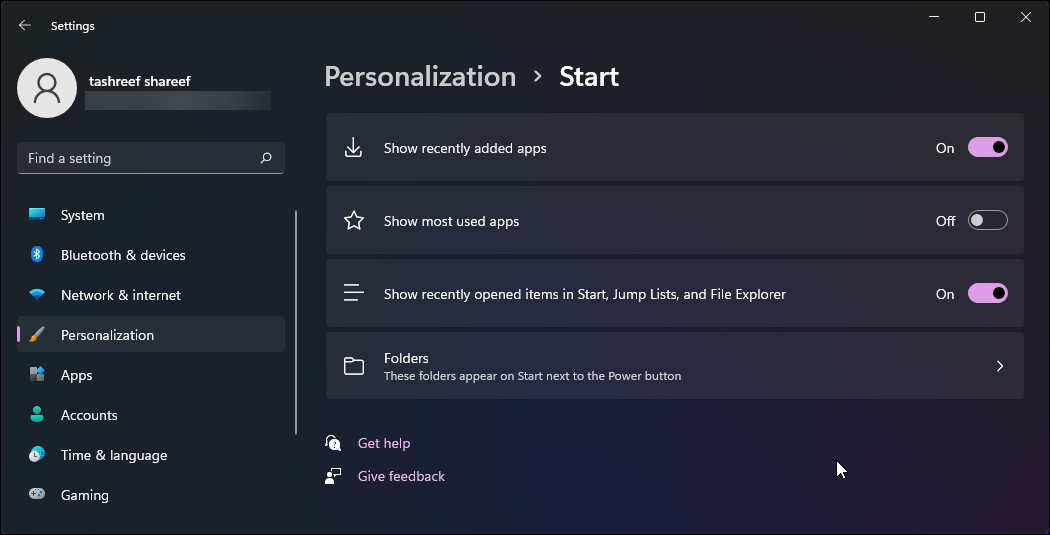
- In the Settings app, open the Personalization tab.
- Next, click on the First pick in the correct pane.
- Here, toggle the switch for Bear witness recently opened items in Get-go, Jump List, and File Explorer and set up information technology to On.
That's information technology. At present open a document or any other file, and information technology should immediately announced under the Recent Files section in Quick Access.
As discussed earlier, enabling Bound List means the recent files and apps volition announced under the Recommended section of your Start bill of fare. It is an inconvenient solution for some. Only unfortunately, at that place isn't a workaround yet.
If the Leap List option is already set up to On, motility to the next pace.
two. Enable Contempo Files in Quick Access Properties
Y'all tin can enable or disable recent files and other properties for the Quick Access feature. Here is how to enable contempo files from the Folder Options.
- Press Win + Due east to open File Explorer.
- Right-click on Quick Access.
- Click on Show more options and and so click on Options.
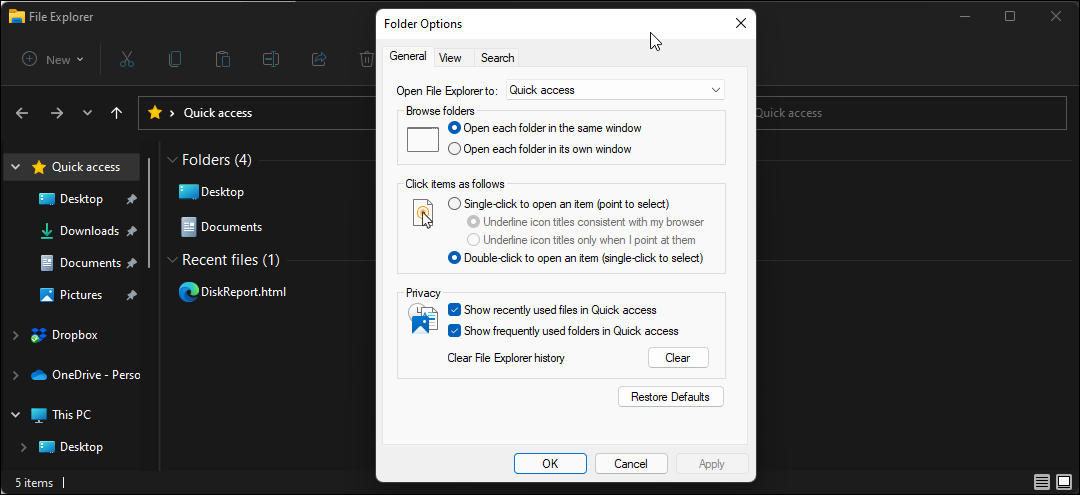
- In the Properties window, open the General tab.
- Next, in the Privacy section, cheque Evidence recently used files in the Quick Access option.
- Click Apply and OK to salvage the changes.
Now open any file to see if it appears under Contempo File in Quick Admission.
At times, checking the Testify recently used files pick in Quick Access options doesn't stick after applying the changes. It happens if you have disabled Bound List as discussed in the beginning method.
Follow method one in this commodity and enable the Bound List option in the Kickoff settings to resolve the event.
three. Clear File Explorer History

Clearing the File Explorer history may help you prepare recent files not showing up in Quick Access.
To articulate File Explorer history:
- Open File Explorer.
- Right-click on Quick Access, select Show more options > Options.
- Click the Clear button nether the Privacy section.
- Click Use and OK to save the changes.
4. Restore Folder Options to Default
You can reset the Binder Options for Quick Access to the default configuration to fix this problem. Note that the reset will remove all the customization you may accept fabricated to Folder Options and require reconfiguration.
To restore binder options:
- Right-click on Quick Access, and so select Testify more than options > Options.
- Click the Restore Defaults button.
- Click OK to save the changes.
- Open File Explorer and cheque for whatsoever improvements.
5. Create a New Local User Business relationship
Another way to restore the Recent Files in Quick Admission is to create a new local user business relationship. Follow these steps to create a new local user account in Windows 11.
- Press the Win + I to open Settings.
- In the left pane, click on the Account tab.
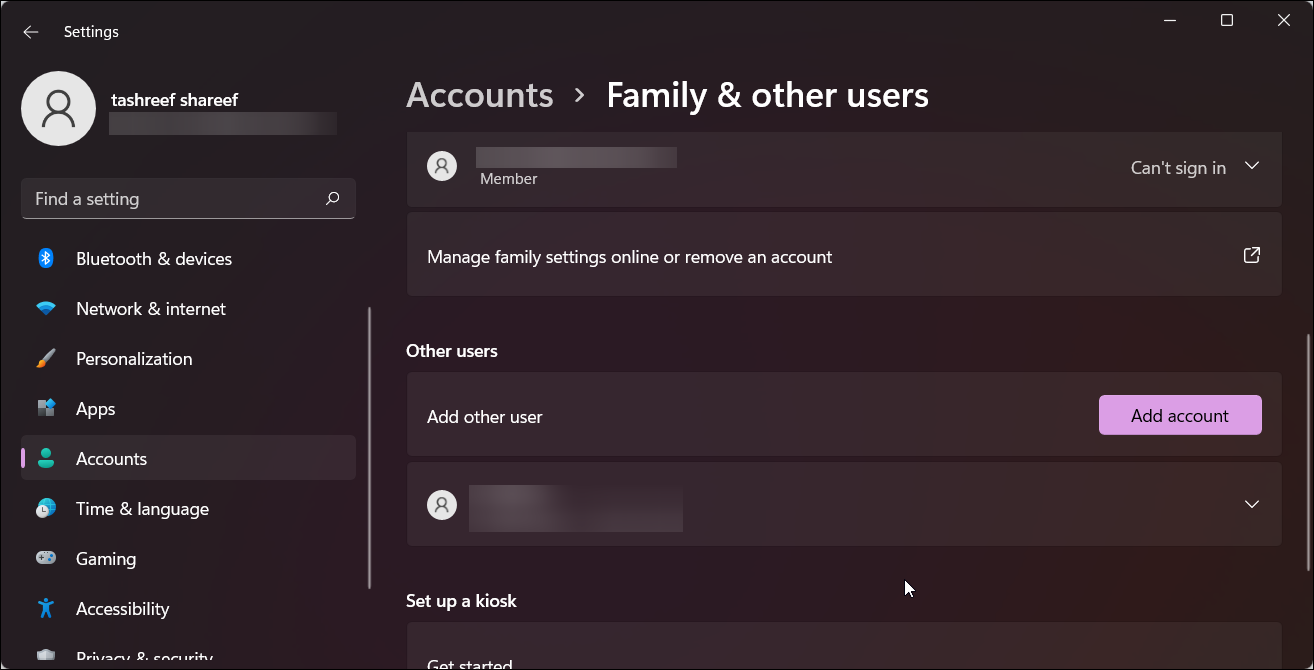
- In the correct pane, click on Family & other users.
- Scroll downward to the Other users department.
- Click the Add business relationship button for Add other users.
- To create an account without adding Microsoft business relationship, cick on I don't have this person'due south sign-in information.
- Side by side, click on Add a user without a Microsoft Account.
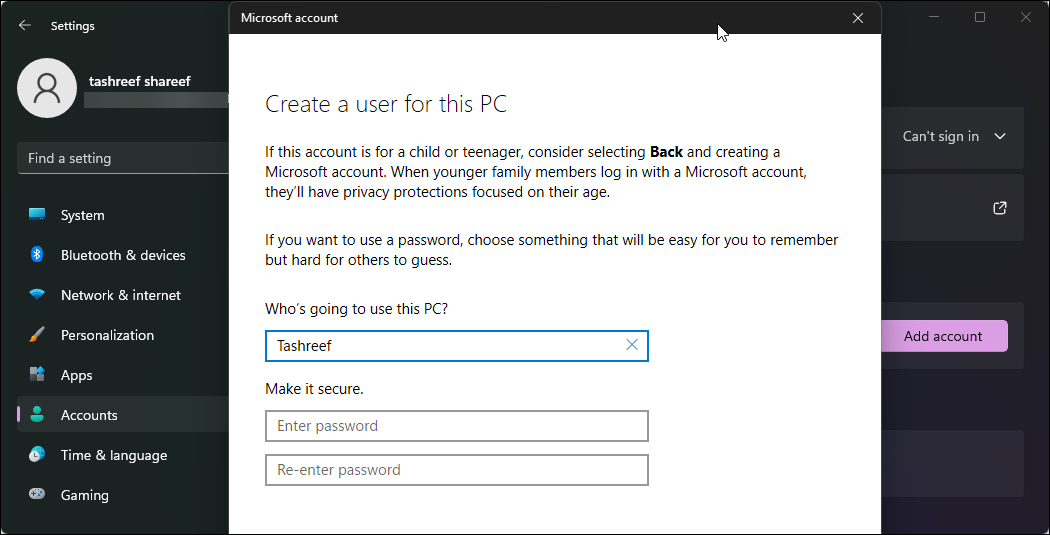
- Type a name for the user account and enter a password. You lot can leave the password field empty, but we would not recommend creating an unguarded authoritative account.
- Click Next, and a new user account will appear under Other users.
- Click on your account proper noun to expand the options. And then, click on Change account type.
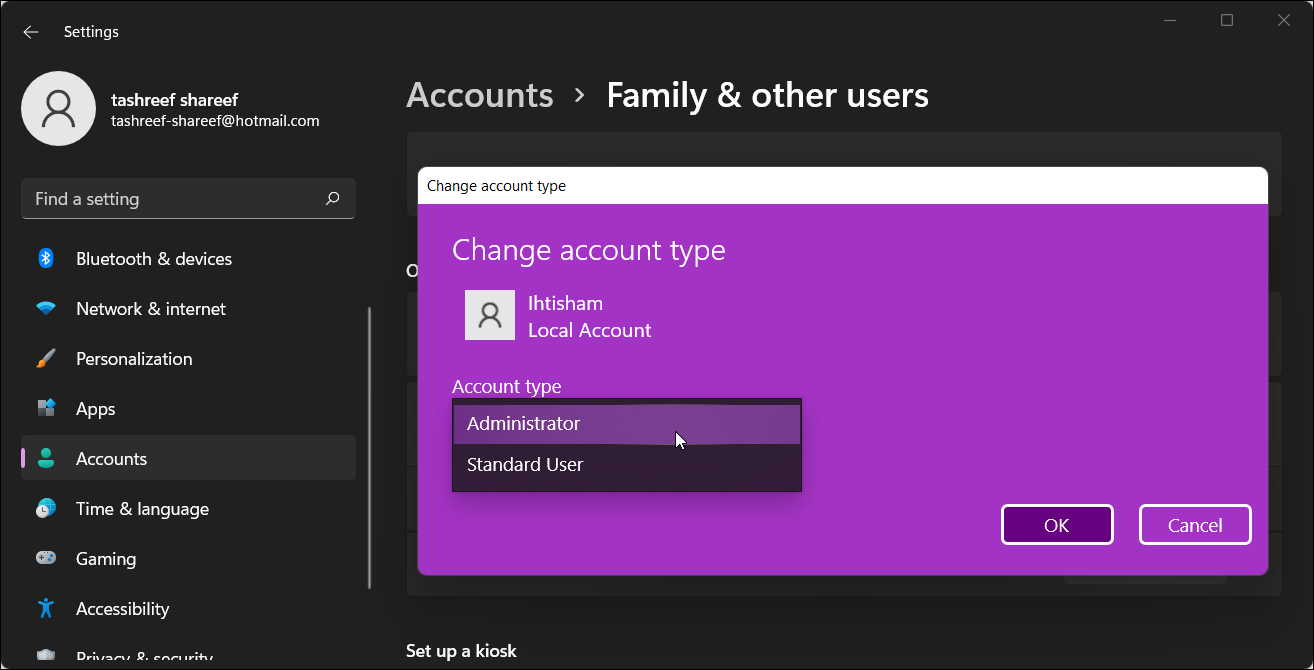
- Click the drop-down and select Administrator.
- Click OK to apply the changes.
That's it. Now login with your new user account and Recent Files will bear witness again under Quick Admission.
Show Missing Recent Files in File Explorer's Quick Admission
You lot can solve the curious case of Quick Access non showing Recent Files in File Explorer by enabling the Spring List option in the Start settings. Additionally, ensure the Recent Files option is enabled in the Folder Options. Every bit a concluding resort, create a new local user business relationship as administrator to restore the functionality.
About The Writer

Source: https://www.makeuseof.com/windows-11-fix-quick-access-not-showing-recent-files/
Posted by: parkisonthempoess.blogspot.com
0 Response to "How To See Recently Opened Apps Windows 10"
Post a Comment