

Japanese Cherry Blossom Pencil Drawing
Nature is full of many different beautiful trees, plants and flowers. The cherry blossom tree is one of the most beautiful of them all.
With their unique structure and beautiful pink flowers, these trees have become an iconic tree for Japan, which is where they originate from.
Their beauty can also make it lots of fun to learn how to draw a cherry blossom tree.
While they have a fairly complex look to them, by the end of this guide you will see how easy it can be!
This step-by-step guide on how to draw a cherry blossom tree will have you recreating this amazing tree in no time!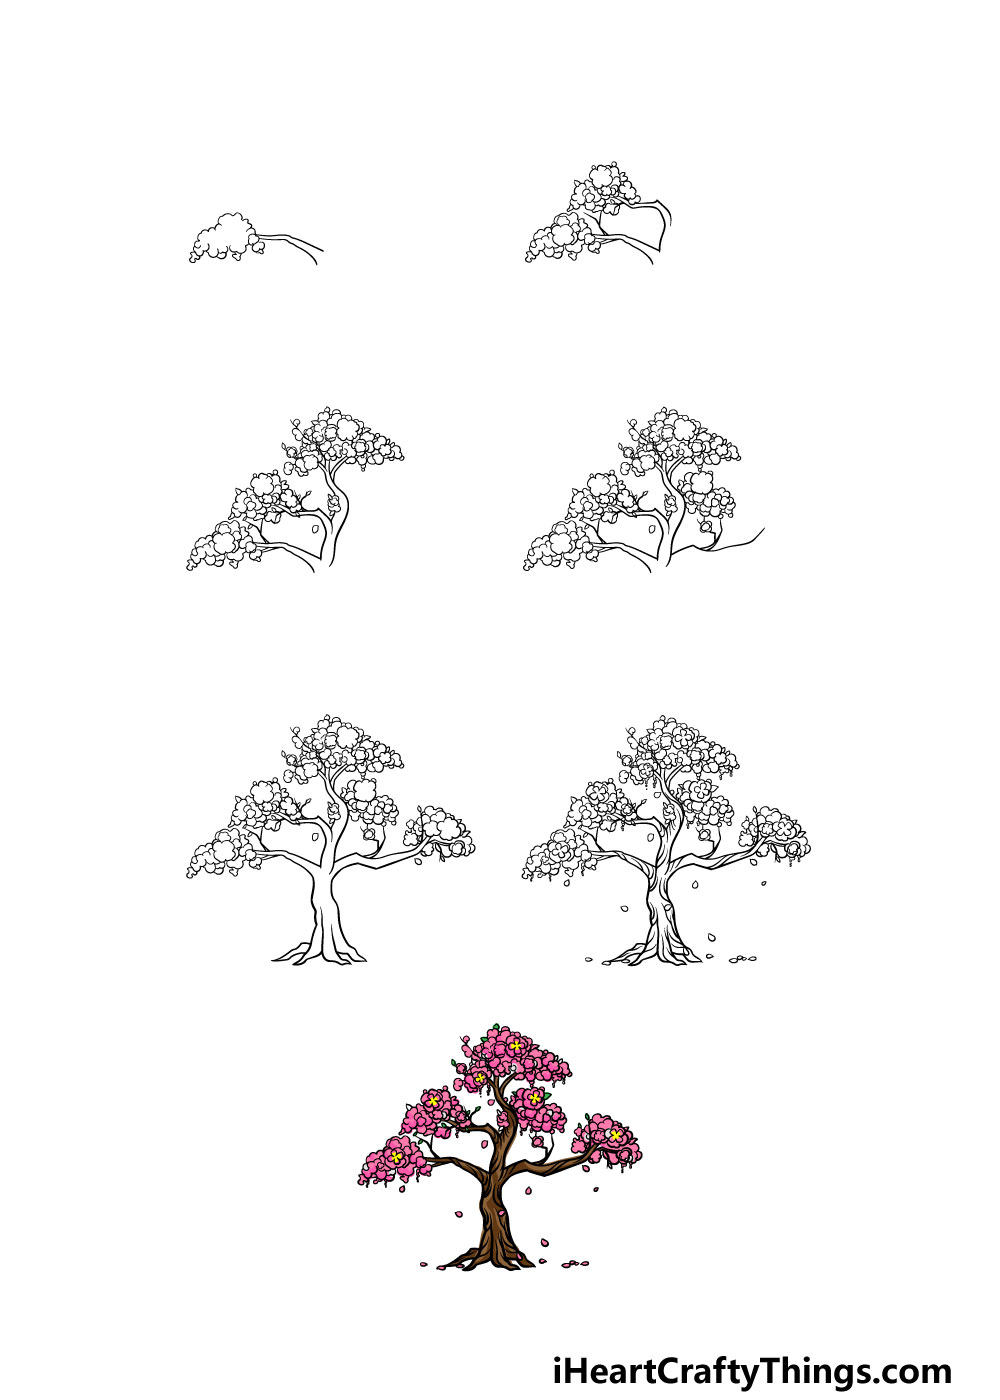
What's in this Blog Post
- How to Draw A Cherry Blossom Tree – Let's Get Started!
- Step 1
- Step 2 – Next, draw some details for the flowers on the trees
- Step 3 – Now, draw some more of the flowers on the tree
- Step 4 – Keep adding some details to the flowers of the tree
- Step 5 – Finish off the details for the flowers and branches in this step
- Step 6 – Now, finish the final details and erase the pencil lines
- Step 7 – Finish off your cherry blossom tree drawing with some color
- Your Cherry Blossom Tree Drawing is Complete!
How to Draw A Cherry Blossom Tree – Let's Get Started!
Step 1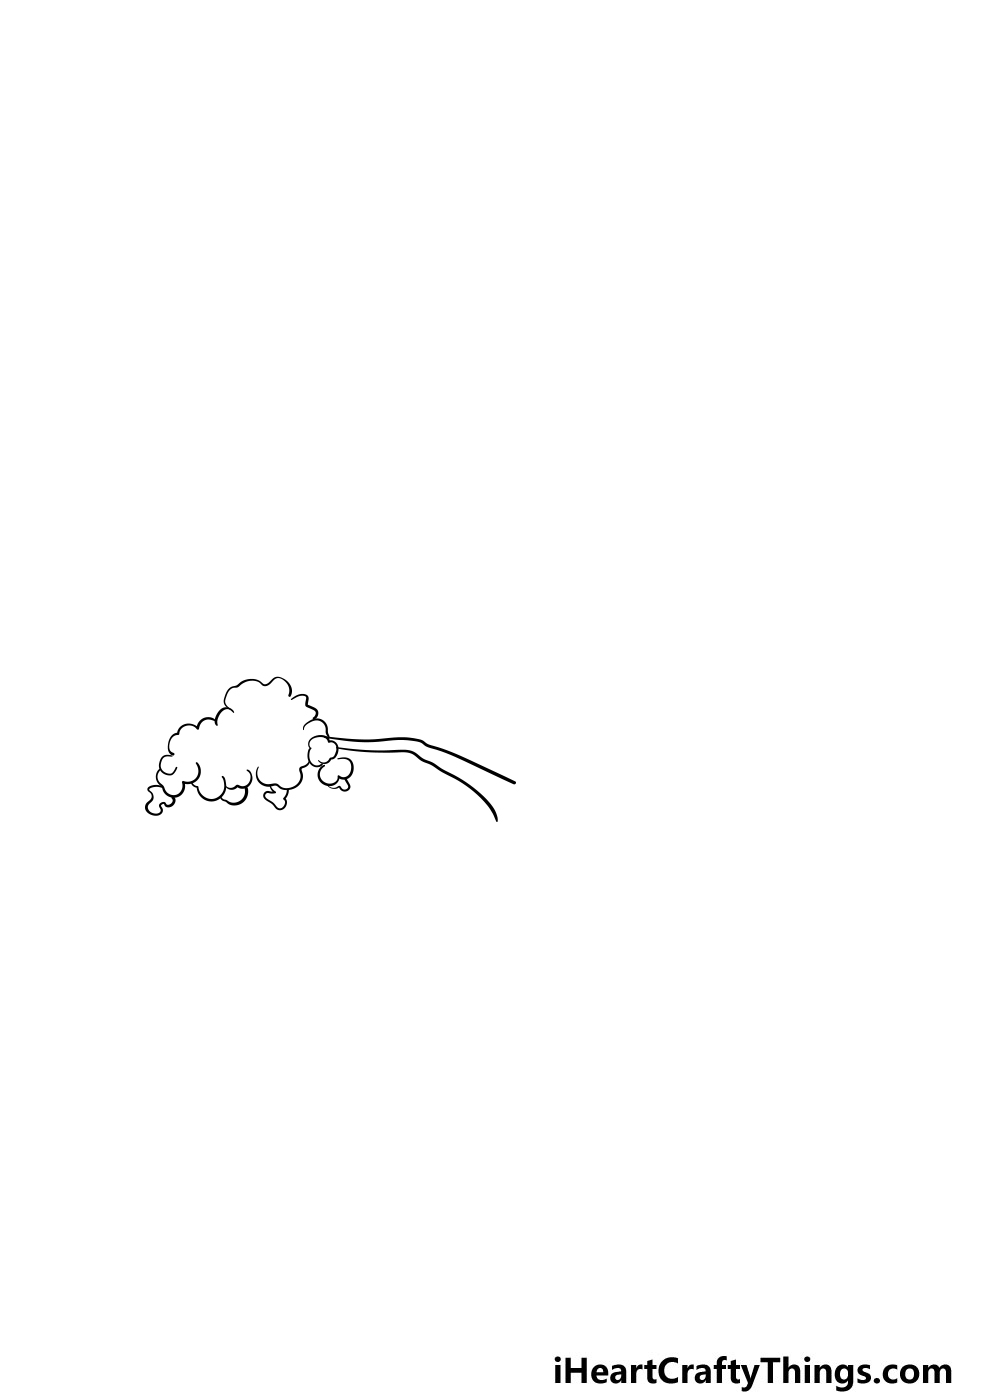
The best way to make your life easier when drawing is to plan it out properly beforehand. For this reason, we will be drawing some pencil outlines in this step of our guide on how to draw a cherry blossom tree.
Using the reference image as your guide, you can use your pencil to draw the twisty trunk and branches of the cherry blossom tree.
Then, you can draw some irregular round shapes on the branches, as these will guide you when you start drawing individual flowers later on.
Once you're happy with these pencil guides, you can use your pen to start drawing over some of the branches and also the outlines of the clumps of flowers, as shown in our reference image.
Step 2 – Next, draw some details for the flowers on the trees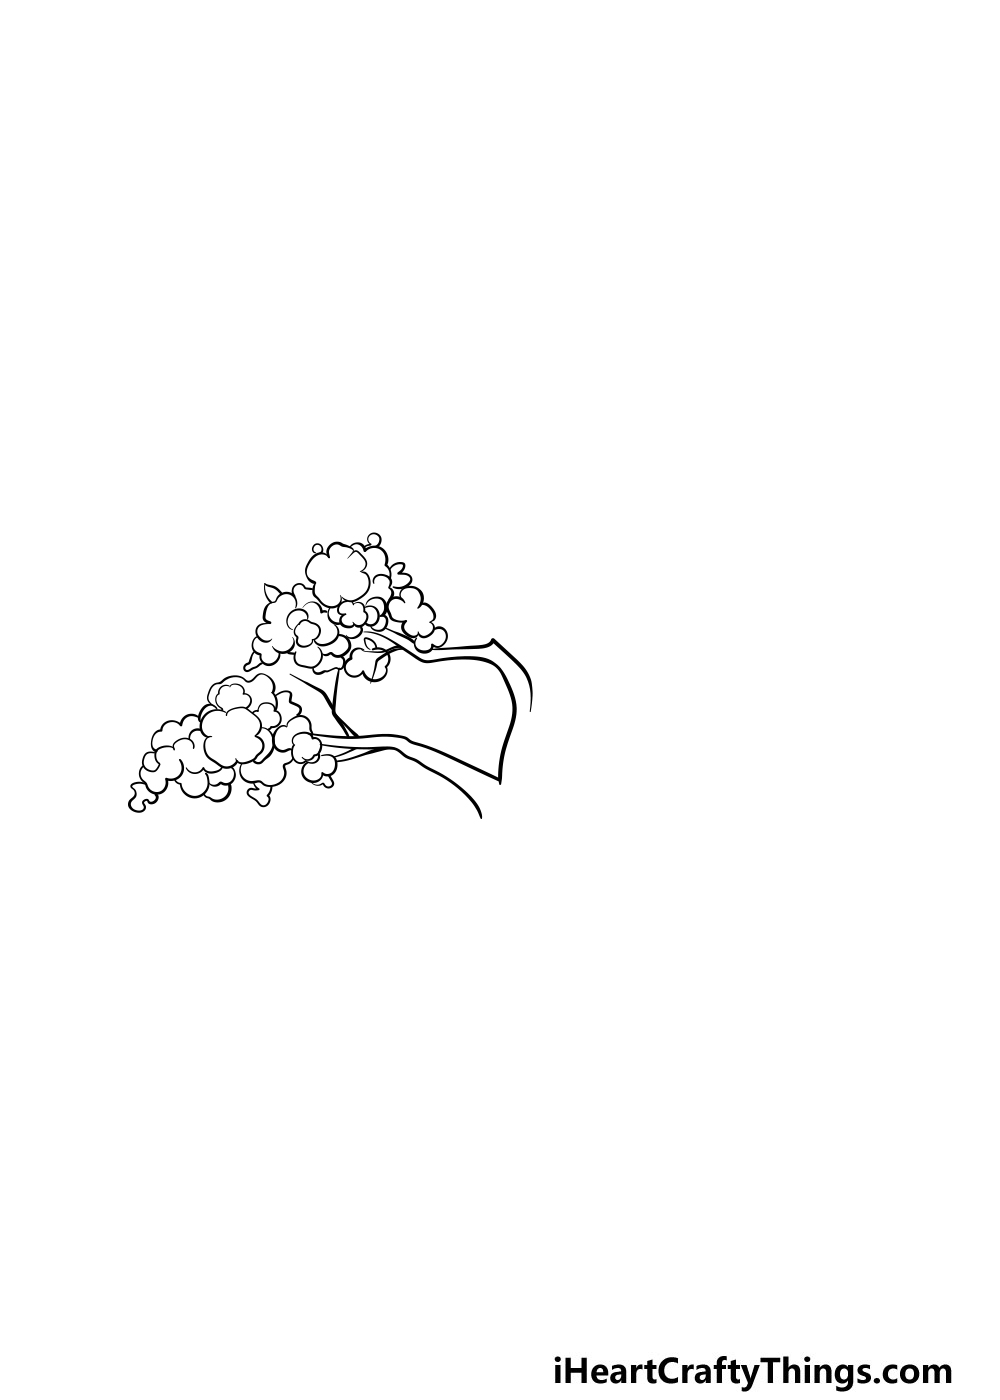
You can start to add some details in this part of your cherry blossom tree drawing. To do this, you can add some round little shapes within the flower outlines that you drew in the previous step.
You can also go over some of the pencil lines of the branches in this step to start building them up.
Step 3 – Now, draw some more of the flowers on the tree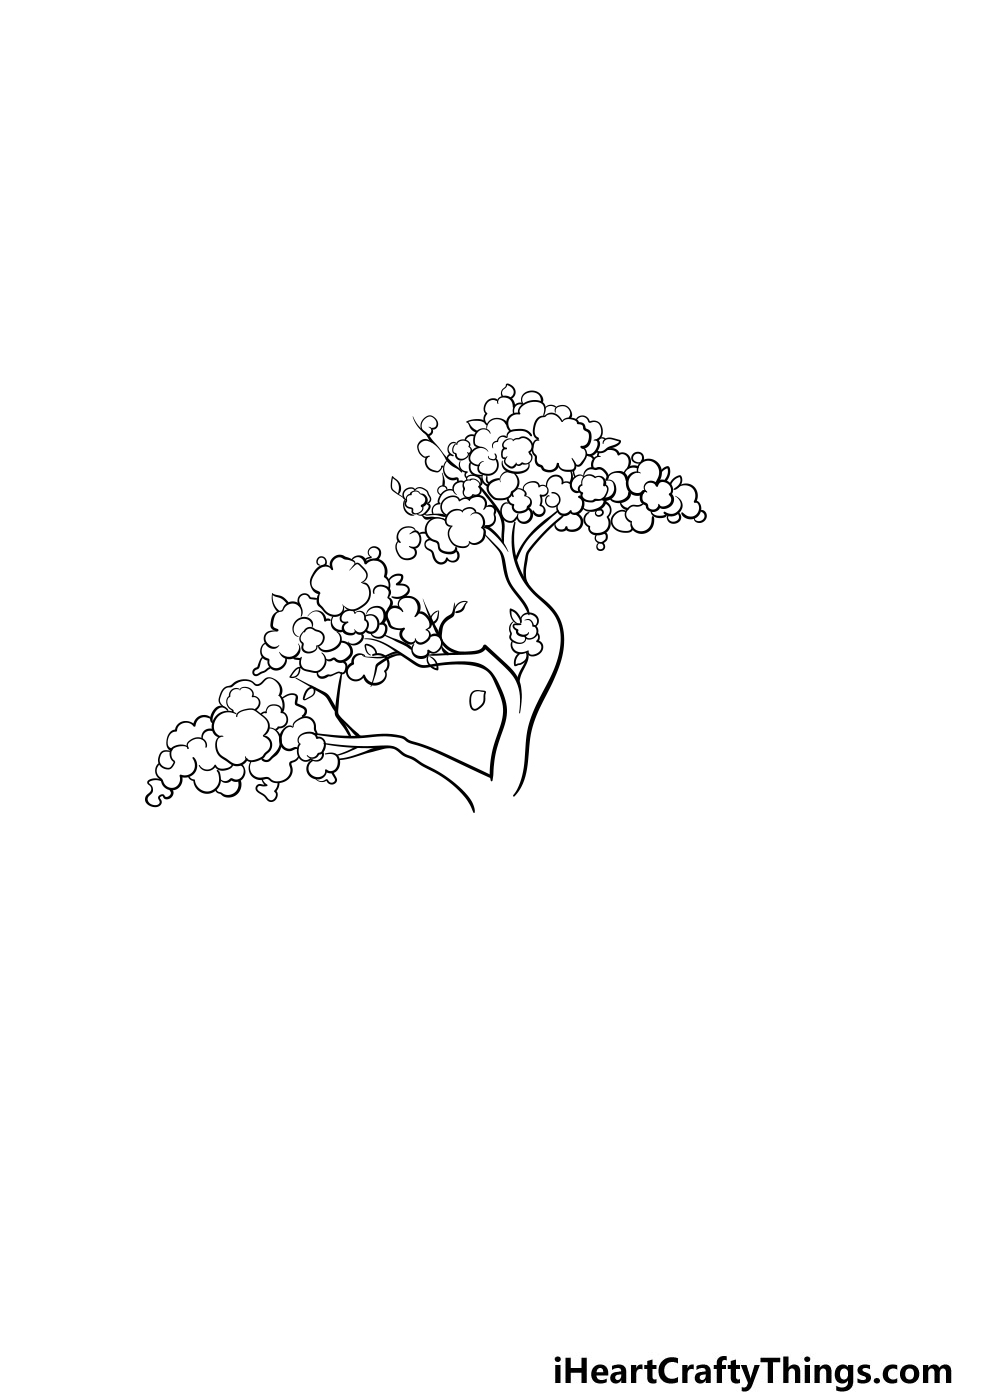
This step of our guide on how to draw a cherry blossom tree will have you continuing to add some pen details to the branches and flowers.
For this part, we will be adding some details to the top bunch of flowers on the tree.
As with the other ones, you will be drawing lots of small, rounded shapes within the outline of the flowers as a whole.
You can also draw some thin branches poking out to add to the detail even more.
Step 4 – Keep adding some details to the flowers of the tree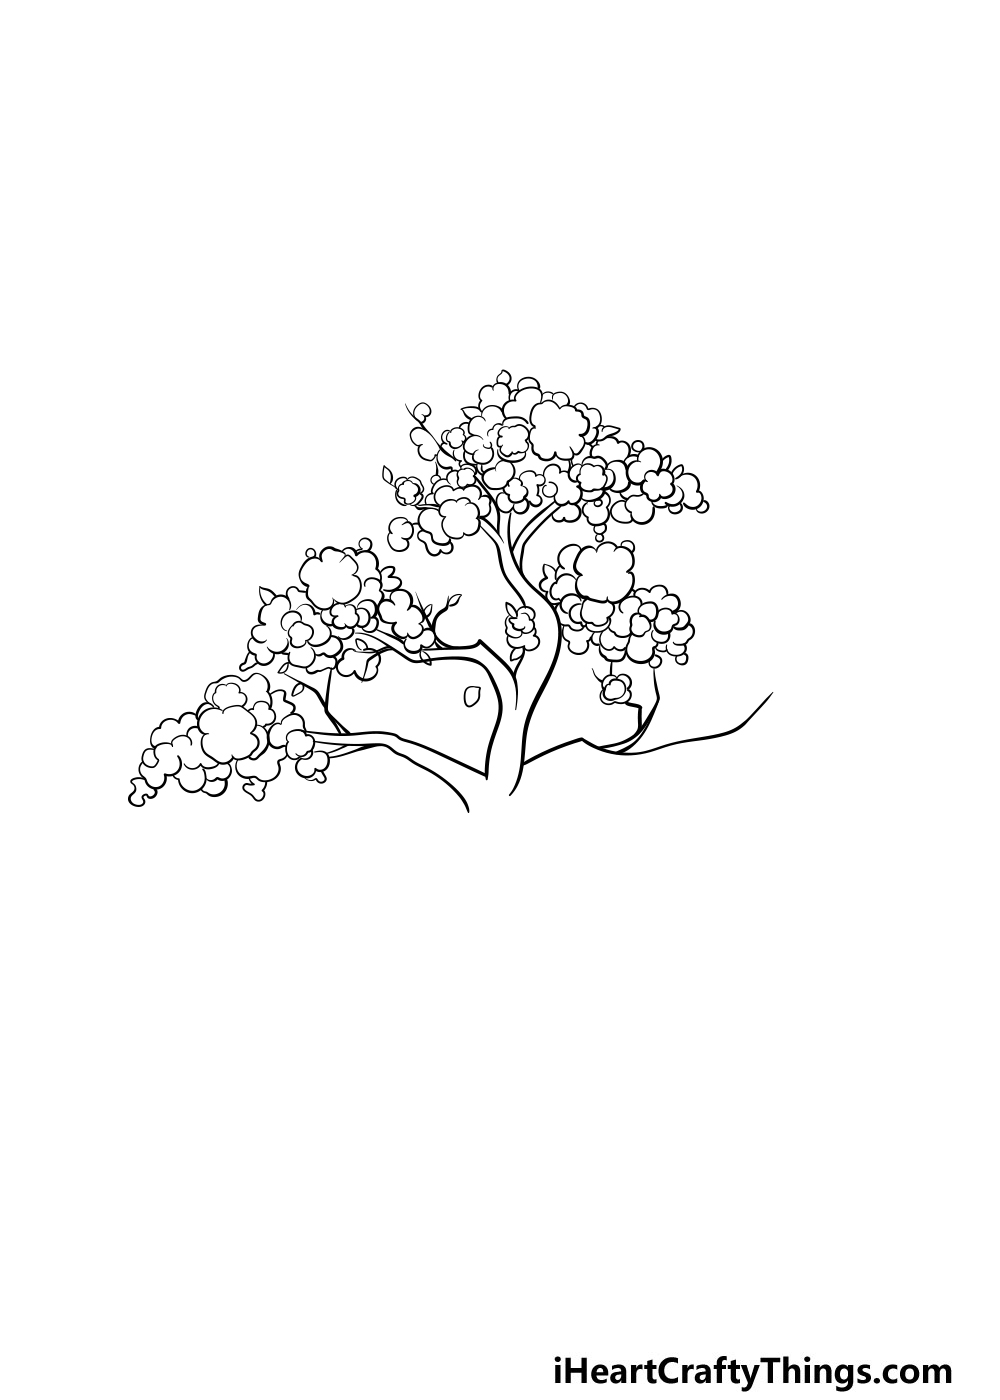
We will continue going over the pencil outlines with your pen for this part of your cherry blossom tree drawing.
You can add more details to the next clump of flowers as you did in the previous few steps. As you can see in our reference image, you can also keep adding some lines over the branches.
Step 5 – Finish off the details for the flowers and branches in this step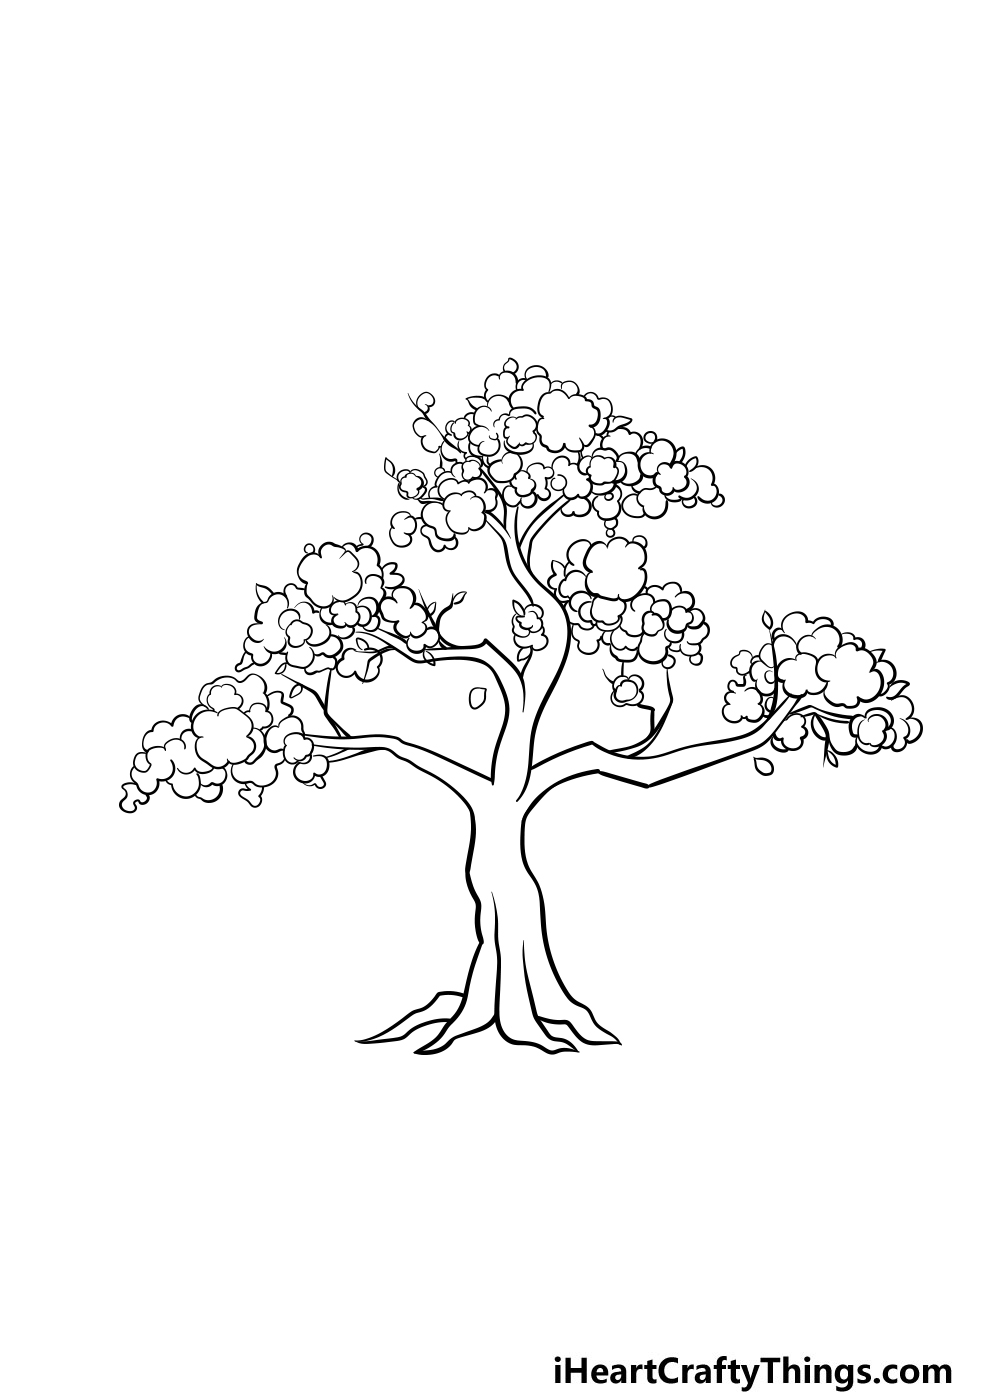
For this step of our guide on how to draw a cherry blossom tree you will continue with what you have been doing for the previous few steps.
That means that you will be finishing off the outline of the final branches and flower clumps. You can also finish off the lines for the trunk and the roots of the tree.
Once you have all the outlines drawn, we can move on to some final details in the next step.
Step 6 – Now, finish the final details and erase the pencil lines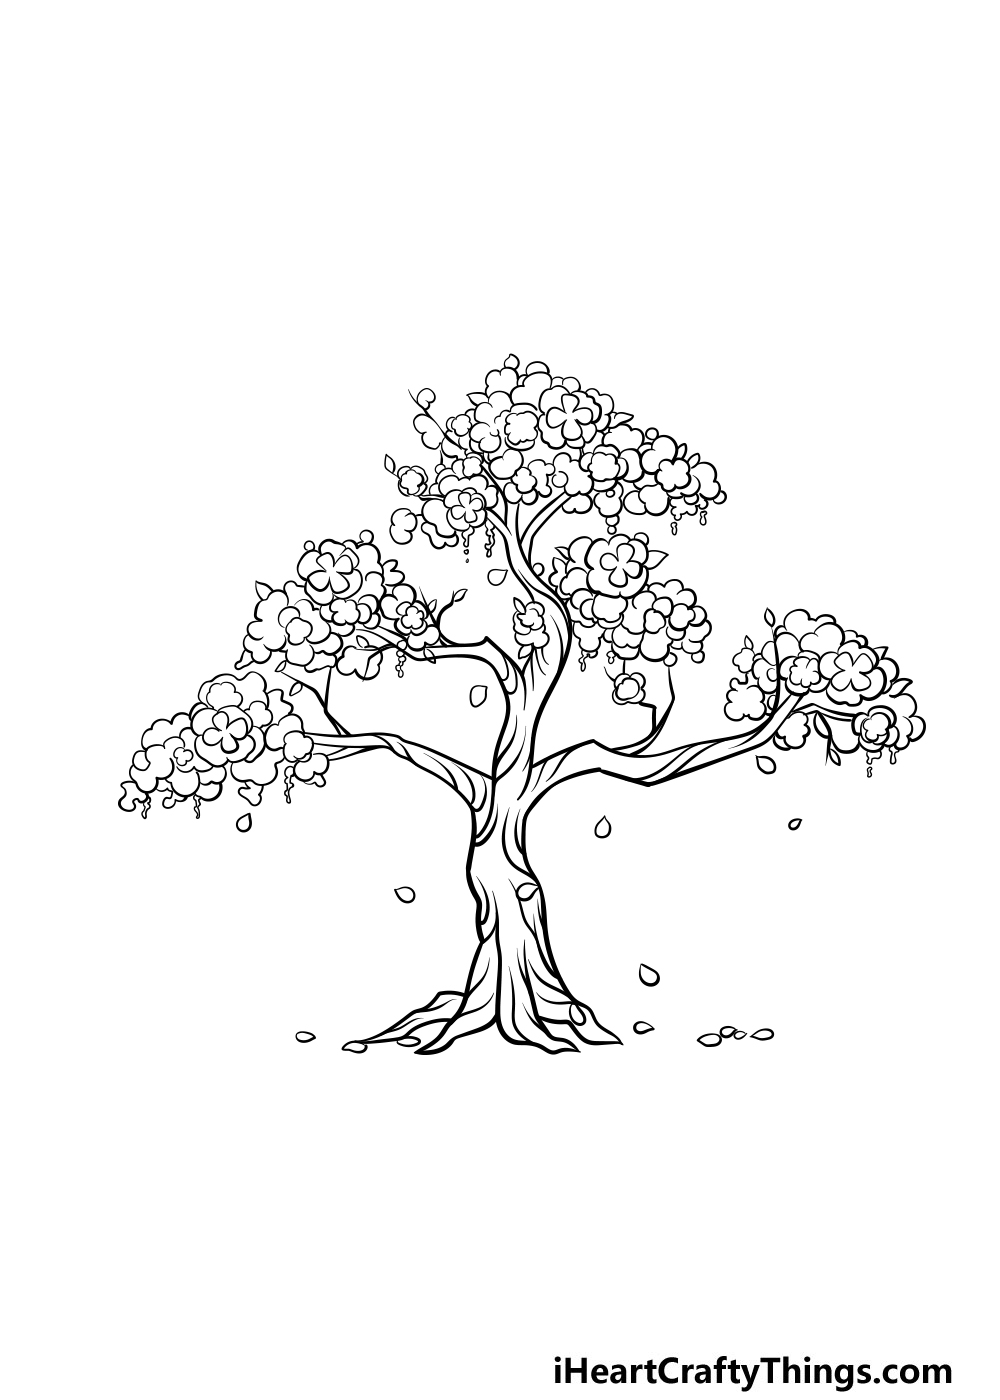
It's almost time to add some beautiful colors to your cherry blossom tree drawing, but before you do there are some final details to add first.
You can start by adding even more flower shapes into the flower clumps on the branches. This will add a lot of depth to the flowers which will be the star of this drawing!
Then, you can add some wavy lines throughout the branches and trunk of the tree to make it look more wooden.
You can then draw some small shapes coming down from the branches to make it look like petals are floating down.
Once you have all the final details drawn, you can then erase all of the pencil lines from the first step, as you won't be needing them anymore.
Before you move on to the final step, you can also add some details of your own. Maybe you could draw a pretty background for the image to really finish it off!
Step 7 – Finish off your cherry blossom tree drawing with some color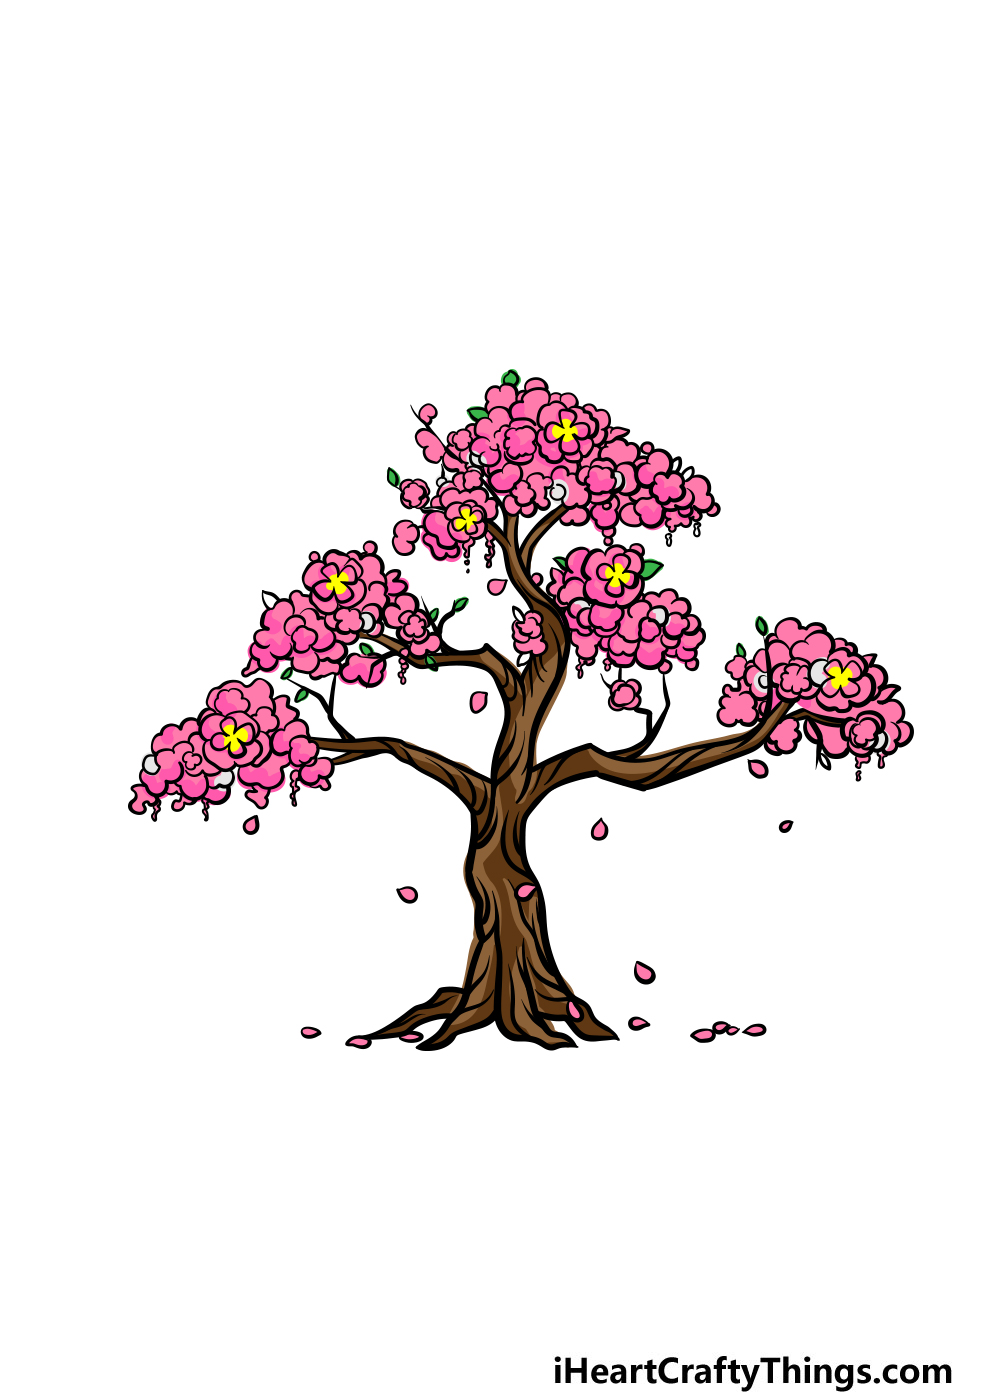
This final step of this guide on how to draw a cherry blossom tree will be all about adding some beautiful colors to it to really bring it to life!
Cherry blossom trees are well known for their pretty pink coloring, and that is what we went for in our reference image example.
Even though the tree has a very specific color scheme, you can also change it up by using some different art mediums and tools.
For a picture like this, it is always well suited to a softer medium such as watercolor paints and colored pencils for a more muted, classic look to the image.
It will also look great if you use more vibrant mediums, so what do you think you will use to finish it off?
Your Cherry Blossom Tree Drawing is Complete!
We hope that you really enjoyed this guide on how to draw a cherry blossom tree!
When you first saw the image that you would be drawing it may have looked intimidating, but our goal with this guide was to show you how easy and fun it can be!
Now that you have completed the drawing and colored it in, you can keep adding your own details and elements to it.
Whether you change up the details, add a background or play around with art mediums we know it will look fantastic!
Our website is full of new drawing guides for you to enjoy! We upload new ones all the time as well, so visiting the website often is the best way to never miss out.
We would love to see your completed cherry blossom tree drawing, so please be sure to share it on our Facebook and Pinterest pages for us to enjoy!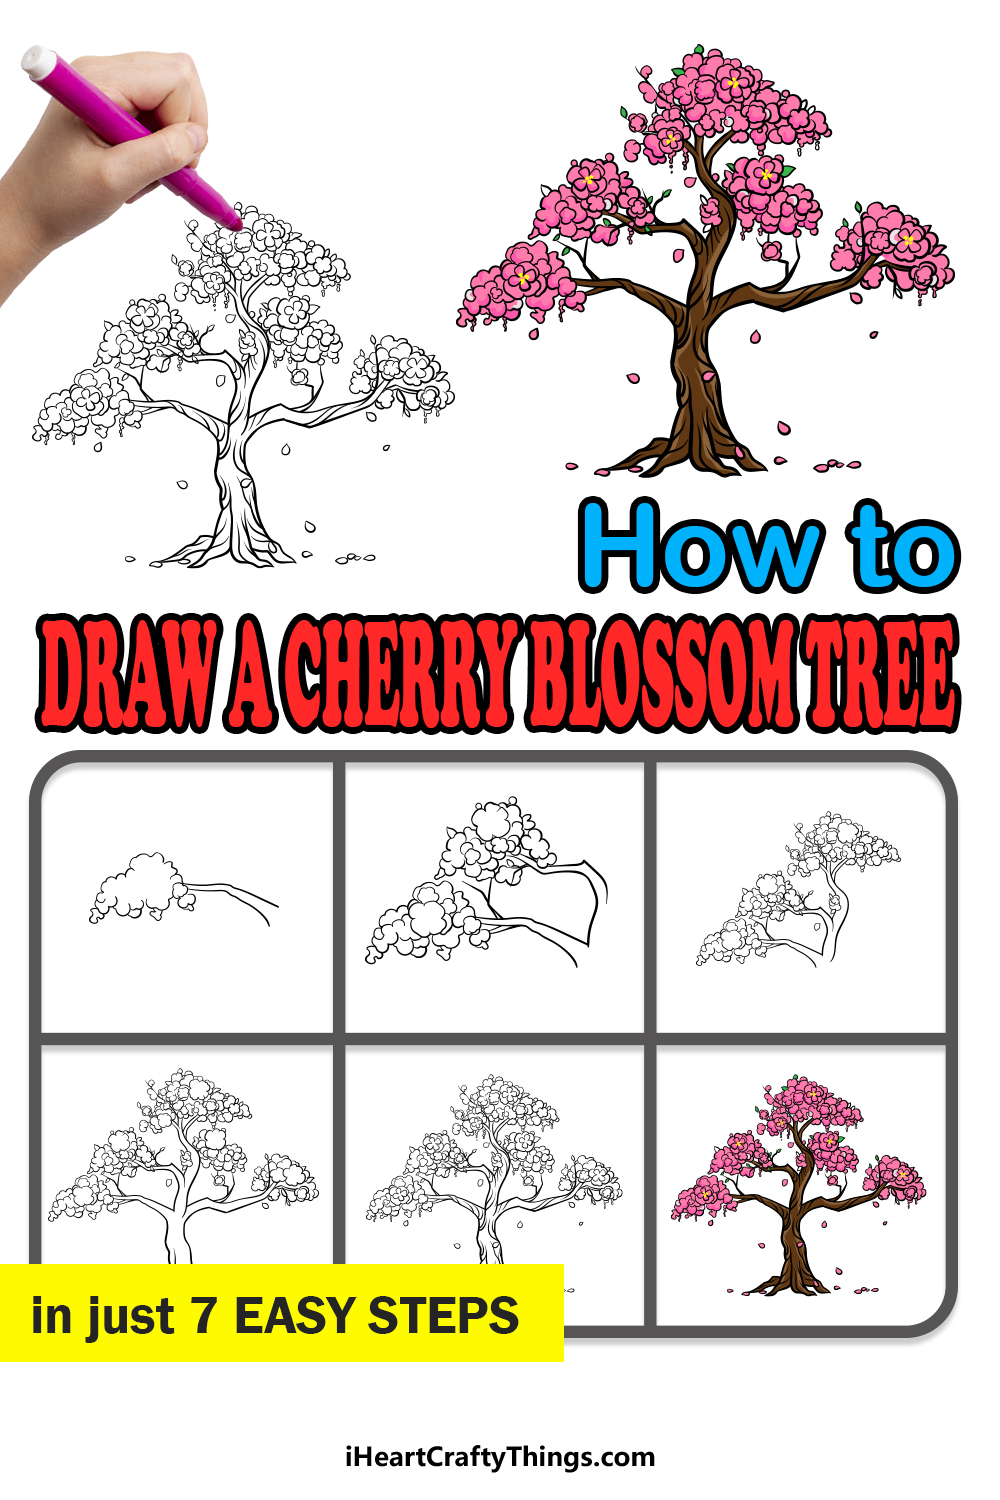
Japanese Cherry Blossom Pencil Drawing
Source: https://iheartcraftythings.com/cherry-blossom-tree-drawing.html
Posted by: parkisonthempoess.blogspot.com
0 Response to "Japanese Cherry Blossom Pencil Drawing"
Post a Comment